
ブログ

How to Hold a Guitar Pick: The Ultimate Beginner-to-Advanced Guide
Whether you're strumming your favorite chord progression or shredding a complex solo, one small but mighty tool plays a vital role in your tone and...
Whether you're strumming your favorite chord progression or shredding a complex solo, one small but mighty tool plays a vital role in your tone and technique—the guitar pick. For many beginners, holding the pick feels awkward at first, and even intermediate players sometimes develop bad habits that hinder their progress. In this comprehensive guide, we'll walk you through how to hold a guitar pick correctly, why it's important, how your grip affects your playing, and how to tailor your technique for different styles like rock, jazz, blues, and metal. Why the Guitar Pick Matters Before diving into the technique, let’s understand why proper pick handling matters: Sound Control: Your pick affects your tone, attack, and dynamics. Speed & Precision: A proper grip allows for efficient, accurate picking. Comfort & Endurance: Correct technique reduces hand fatigue and injury risk. Versatility: Holding your pick right lets you switch easily between strumming and picking. Now let’s start with the basics. Step-by-Step: How to Hold a Guitar Pick Properly Step 1: Choose the Right Pick Your pick should match your playing style. Here are the key factors: Thickness (Gauge): Thin (0.38–0.60 mm): Great for strumming; flexible but less control. Medium (0.60–0.85 mm): Good balance for both strumming and picking. Heavy (0.85–1.20+ mm): Best for lead guitar and articulate playing. Shape: Standard Teardrop: Most common and versatile. Jazz III: Smaller, sharper for precision. Triangle: Larger, ideal for bass or players with big hands. Material: Nylon: Flexible and grippy. Celluloid: Traditional tone, smooth feel. Tortex/Delrin: Durable with good grip. Choose a pick that feels comfortable and suits your musical goals. Step 2: Form the Grip Relax Your Hand: Start with your picking hand relaxed, fingers naturally curled as if you're holding a small object. Thumb Placement: Place the pick on the side of your index finger (not the pad). Lay your thumb flat over the pick so it holds it in place. The pointy tip of the pick should face out, perpendicular to your thumb. Index Finger Position: The index finger should curl slightly behind the pick. Don’t pinch too hard—just enough pressure to keep it stable. Expose the Tip: Let only about ¼ inch of the pick protrude from between your fingers. Too much pick = floppy, imprecise playing. Too little = pick may slip or dig in too deeply. Step 3: Pick Angle and Wrist Position Pick Angle Hold the pick at a slight angle to the string—about 10–15 degrees tilted. This helps the pick glide over the strings smoothly rather than get caught. Avoid a perfectly flat angle unless you want a sharp, aggressive attack (common in metal or hard rock). Wrist Motion Use your wrist to strum or pick—not your elbow. Keep your wrist loose and relaxed. For fast alternate picking, a combination of wrist and slight forearm rotation is ideal. Visual Reference: The "Coin Method" If you’ve ever held a coin to flick it, that’s roughly how your fingers should hold the pick. Try holding a coin and mimicking a strumming motion. Then switch to the pick—same idea, just more finesse. How NOT to Hold a Guitar Pick (Common Mistakes) Here are some common bad habits that can lead to poor technique or discomfort: Too Much Tip Exposed: Leads to loss of control. Death Grip: Holding the pick too tightly causes hand tension and fatigue. Using Fingertips Instead of Pad: Less stability. Straight, Rigid Wrist: Limits speed and causes strain. Floppy or Wobbly Pick: Indicates an unstable grip—usually too light or too much tip exposed. Adjusting Your Grip for Different Techniques Strumming Chords Use a medium or thin pick. Hold the pick more loosely for a flowing motion. Keep the pick angled slightly and let it glide across the strings. Lead Playing / Solos Use a heavier pick for control. Grip more firmly for accurate attacks. Use alternate picking: down-up-down-up motion. Hybrid Picking (Pick + Fingers) Hold the pick normally with thumb and index. Use middle and ring fingers for plucking strings. Works well in country, blues, and fusion styles. Economy Picking / Sweep Picking Angle the pick slightly downward for fluid string transitions. Use wrist and forearm rotation for sweeping motion. Use a jazz-style grip for tight control. Tips for Beginners Practice Slowly: Accuracy first, speed later. Mirror or Video Feedback: Record yourself to check hand posture. Use a Metronome: Helps with rhythm and consistency. Try Different Picks: Your preferences may change as you develop. Be Patient: It may feel weird at first—stick with it! Advanced Tips: Refining Your Pick Technique Pick Slanting Used in advanced picking styles, especially alternate and economy picking. Downward Slanting: Pick slants down toward the floor; good for downward string changes. Upward Slanting: Pick slants up; good for upward string changes. Two-Way Pick Slanting: Combines both—ideal for speed picking. This technique minimizes resistance and improves string-switching accuracy. Rest Stroke vs. Free Stroke Free Stroke: Pick passes through string without hitting the next—good for speed. Rest Stroke: Pick stops/rests on next string—adds control and dynamics. Classical guitarists use these terms, but they apply to pick users too. Training Exercises to Improve Pick Control Down-Up Picking on One String Use a metronome at 60 bpm. Play eighth notes (down-up-down-up). Focus on consistency and tone. String Skipping Pick strings 6 → 4 → 2 and back. Helps improve accuracy and grip control. Scale Runs Play scales slowly with alternate picking. Use a mirror to monitor your hand movement. Tremolo Picking Rapid alternate picking on one note. Builds wrist speed and pick control. What the Pros Do (Examples) Eddie Van Halen: Held the pick between thumb and middle finger to free up index for tapping. John Petrucci (Dream Theater): Uses Jazz III picks and two-way slanting for blazing speed. James Hetfield (Metallica): Downstrokes with firm grip for aggressive rhythm playing. Andy McKee (Acoustic fingerstyle): Rarely uses a pick—shows it’s optional for some genres. There’s no one-size-fits-all method, but all professionals start with a solid foundation. FAQ: Quick Answers for Common Questions Q: Should I use a pick or fingers?A: Depends on your style. Pick is better for speed and precision; fingers offer dynamics and texture. Q: My pick keeps slipping—what should I do?A: Try a grippier pick (e.g., Tortex or textured grip), or adjust your pressure and angle. Q: Can I play acoustic guitar with a pick?A: Absolutely! It helps with strumming and articulate picking. Q: Is there a “wrong” way to hold a pick?A: Only if it causes discomfort or limits your technique. Experiment, but aim for a stable, relaxed grip. Final Thoughts Holding a guitar pick may seem like a small detail, but it has a massive impact on your playing. From tone to technique, speed to stamina, everything is influenced by how you grip that little triangle of plastic. Whether you’re strumming folk ballads, playing jazz standards, or melting faces with metal solos, your pick technique is the bridge between your creative ideas and the sounds your guitar makes. Take the time to learn it right—and your playing will soar. Also read: Why Changing Guitar Strings Matters

How Often to Change Guitar Strings: The Ultimate Guitar Maintenance Guide
When was the last time you changed your guitar strings? If you’re unsure, your tone might already be suffering. Many guitarists—especially beginners—don’t realize how big...
When was the last time you changed your guitar strings? If you’re unsure, your tone might already be suffering. Many guitarists—especially beginners—don’t realize how big of a role strings play in their sound, feel, and overall guitar experience. Just like a car needs regular oil changes, your guitar needs fresh strings to perform at its best. In this comprehensive guide, we’ll cover everything you need to know about how often to change guitar strings, why it matters, how to extend their lifespan, and how different types of players and guitars require different approaches. Why Changing Guitar Strings Matters More Than You Think Over time, guitar strings lose their brightness, flexibility, and tone. This happens due to a combination of finger oils, sweat, dead skin, dust, friction, and even humidity or air exposure. Once strings start degrading, your guitar’s: Tone becomes dull Tuning becomes unstable Strings feel rough or sticky Intonation suffers Playing becomes less enjoyable Regular string changes are one of the simplest yet most effective ways to make your guitar sound fresh and responsive again. How Often to Change Guitar Strings: A Detailed Breakdown Let’s explore the ideal timeline for changing strings depending on how often and how intensely you play. 1. Beginners or Casual Players (Play 1–2 times a week) Recommended: Change every 3–4 months If you strum a few songs on weekends or play occasionally, your strings can last a bit longer. However, even if you don’t play much, the metal still corrodes over time due to moisture in the air and finger oils. Pro Tip: If your strings look dark or feel stiff, it’s time for a change—even if you haven’t played much. 2. Intermediate Players (Play 3–5 times a week) Recommended: Change every 1–2 months You’ll start noticing that after about a month or so of regular practice, your tone fades and the strings start feeling “worn.” Tuning may also become less stable. This is the perfect time to refresh your set. Pro Tip: Clean your strings after every session to squeeze out extra life from them. 3. Frequent Players (Daily Practice or Jamming) Recommended: Change every 2–4 weeks If you’re practicing scales, playing gigs, or just jamming daily, you’ll wear out your strings quickly. For electric guitarists, aggressive bending and fast finger movements wear down the winding. Acoustic players will notice tonal dullness and squeaky slides. Pro Tip: Invest in coated strings like Elixir or D'Addario EXP for extended durability. 4. Performers & Gig Musicians Recommended: Change strings every 1–2 weeks, or before every gig Performance-grade tone and tuning stability require fresh strings. Professionals often change strings before every show to avoid string breaks or tonal inconsistencies on stage. Pro Tip: Always carry a backup set. Live gigs can get sweaty and high energy—fresh strings are non-negotiable. 5. Studio Recording Artists Recommended: Change before every session In the studio, microphones pick up every detail. Dull or worn strings can ruin an otherwise great take. Clean tone, perfect sustain, and intonation are crucial for recording sessions, which is why many pros restring right before recording. Pro Tip: Stretch your new strings and retune multiple times before hitting "record" to prevent slippage. Factors That Affect How Often You Should Change Strings Changing strings isn't just about how much you play. These key factors influence string lifespan: 1. String Material Nickel-wound strings (common on electric guitars) wear faster. Phosphor bronze (common on acoustics) corrode easily. Coated strings (e.g., Elixir) can last 3–5x longer. 2. Body Chemistry Some players have more acidic sweat, which causes strings to rust faster. If you notice premature discoloration, this might be the reason. 3. Climate & Humidity Living in a humid or coastal environment causes faster string oxidation. Use a dehumidifier or case humidifier to help. 4. Playing Style If you strum aggressively, bend a lot, or play with a heavy pick, strings will naturally wear faster. How to Tell When It’s Time to Change Guitar Strings Here are 7 signs that it’s time for a new set: Dull tone – The strings sound lifeless and lack brightness. Tuning issues – Strings won’t stay in tune despite proper tuning. Rough texture – Strings feel gritty or sticky under your fingers. Discoloration or rust – Brown, black, or greenish tint? Time to change. String breakage – One string snapping is a warning. Replace them all. Poor sustain – Notes die out faster than usual. Intonation problems – Chords sound out of tune even when open strings are fine. Acoustic vs Electric vs Classical: String Lifespan Comparison Different guitars and string types wear differently. 🎵 Acoustic Guitar Strings Usually made from bronze or phosphor bronze. Prone to corrosion and tone dulling. Change every 1–2 months depending on playtime. 🎵 Electric Guitar Strings Often nickel-plated steel. Slightly longer lifespan but affected by heavy bending and distortion. Change every 2–4 weeks with frequent play. 🎵 Classical Guitar Strings (Nylon) Nylon treble strings don’t rust but lose tension and tone. Bass strings (wrapped in metal) degrade over time. Change every 3–6 months, or when tone declines. How to Extend the Life of Your Guitar Strings Want to make your strings last longer? Follow these tips: 1. Clean After Every Session Wipe down with a microfiber cloth to remove sweat and grime. 2. Wash Your Hands Before Playing This reduces oils and dirt transferred to the strings. 3. Use String Cleaner or Conditioner Products like Fast Fret or Dunlop String Cleaner can slow corrosion. 4. Store Your Guitar in a Case A closed case with a humidity control pack reduces oxidation. 5. Avoid Extreme Temperature Changes Hot or cold environments can loosen or stretch strings, affecting their lifespan. Should You Change All Strings at Once? Yes, always change the full set. Replacing only one string leads to: Uneven tone Mismatched string tension Premature breakage of older strings It may seem cheaper to change just one string, but in the long run, it affects sound quality and playability. Frequently Asked Questions (FAQs) What happens if I never change my guitar strings? Your tone will suffer, tuning becomes harder, strings may snap mid-performance, and your guitar becomes less enjoyable to play. How do I know what strings to buy? Check your guitar’s manual or consult your local music store. Different guitars require different gauges and materials. Is there a difference between coated and uncoated strings? Yes. Coated strings have a protective layer that resists dirt and moisture, lasting 3–5 times longer than uncoated ones. They're ideal for players looking for durability. Can old strings damage my guitar? They won’t damage the body, but rusty strings can wear down frets faster and cause more finger friction, which can make playing uncomfortable. Do bass guitar strings need changing as often? Bass strings last longer, but they still lose clarity. Change them every 3–6 months depending on usage. Final Thoughts: Listen to Your Strings There’s no strict rule that applies to everyone, but as a guitarist, it’s essential to stay in tune with your instrument—literally and figuratively. If your strings sound off, feel weird, or won’t stay in tune, don’t wait. Changing your guitar strings is cheap, easy, and gives you an instant upgrade in tone and performance. Whether you play once a week or daily, fresh strings can reignite your passion for playing. Quick Recap: Recommended Guitar String Replacement Schedule Playing Frequency Recommended String Change Casual (1–2x/week) Every 3–4 months Hobbyist (3–5x/week) Every 1–2 months Daily Players Every 2–4 weeks Gigging Musicians Every 1–2 weeks Studio Recording Before every session Also Read: How to Take Care of Your Acoustic Guitar

How to Play “Stand by Me” on Guitar – Complete Beginner-Friendly Guide
“Stand by Me” by Ben E. King is more than just a song—it’s an emotional anthem that has stood the test of time since its...
“Stand by Me” by Ben E. King is more than just a song—it’s an emotional anthem that has stood the test of time since its release in 1961. Its soulful vibe, simple lyrics, and heartfelt message make it a go-to track for guitar players of all levels. And the good news? It’s one of the easiest songs to learn on guitar, especially for beginners. Whether you're learning guitar to play around a campfire, impress a friend, or just enjoy music, this tutorial will help you master “Stand by Me” using simple chords and a relaxed strumming pattern. What You’ll Learn in This Blog: The four basic chords used in the song The full chord progression The strumming pattern (easy & intermediate) Lyric snippets with chords Playing tips and techniques to sound like a pro Why “Stand by Me” is a great beginner guitar song Chords Used in “Stand by Me” You’ll be happy to know that this song only uses four chords—all of which are open chords. These chords are among the first any beginner guitarist learns: G Major E Minor (Em) C Major D Major Here’s how to play each: G Major: 320003 E Minor: 022000 C Major: x32010 D Major: xx0232 These chords are easy on the fingers and offer a full, rich sound, perfect for acoustic or electric guitar. Chord Progression: The Magic Four The progression follows a repeating pattern throughout the song: G – Em – C – D This is a I–vi–IV–V chord progression, which is incredibly common in pop and soul music. It's smooth and satisfying to the ear, which is why the song feels so natural and timeless. The best part? You don’t need to memorize different progressions for verse and chorus—it’s the same throughout! Strumming Pattern for “Stand by Me” Start with this easy strumming pattern: Down – Down – Up – Up – Down – Up(D – D – U – U – D – U) If you're just starting out, you can simplify even more with just: Down – Down – Down – Down As you become more confident, work in the original groove of the song by listening to the track and mimicking the rhythm. Pro Tip: Try muting the strings slightly with your palm for a more percussive feel. Lyrics with Chords (Sample Verse) mathematica Repeat the same progression for the rest of the verses and chorus. It really is that simple! Capo Placement To play in the original key, place a capo on the 2nd fret. This raises the pitch to match Ben E. King’s recording, making it perfect for singing along. Pro Tips for Mastering the Song Practice chord transitions slowly. Don’t rush—accuracy is key. Use a metronome to maintain a consistent rhythm. Play along with a backing track or the original song to train your timing. Record yourself to hear your progress and fix any mistakes. Sing along while playing—it’ll help with rhythm and make the experience more fun! Video Tutorials Watching a visual breakdown can really boost your learning. Look up beginner guitar tutorials for “Stand by Me” on YouTube—many include on-screen chord changes and slow walkthroughs. Some YouTube channels to check out: Justin Guitar Marty Music GuitarZero2Hero Andy Guitar Why Learn “Stand by Me”? This song is ideal for beginners because: It uses only four easy chords Has a slow tempo, making it great for practice Offers repetitive structure—easy to memorize It’s a well-known, feel-good song that’s fun to play and sing Builds a strong foundation for learning other popular songs Fun Fact Did you know that “Stand by Me” has been covered by over 400 artists? From John Lennon to Florence and the Machine, its influence spans genres and generations. By learning this song, you’re tapping into a piece of music history. Final Thoughts “Stand by Me” is not just a song—it’s an experience. Learning to play it on the guitar is a rewarding first step into the world of music. With its simple chords, memorable progression, and heartfelt lyrics, it’s a timeless tune that’s easy to master and hard to forget. So grab your guitar, tune up, and let the music carry you. With just a little practice, you’ll be playing and singing this classic in no time. Also read: Best Way to Learn Guitar

How to Build a DIY Guitar Stand – Plus the Perfect Alternative!
A guitar is more than just a musical instrument—it’s a cherished companion. Every guitarist wants to keep their instrument safe, secure, and accessible. While you...
A guitar is more than just a musical instrument—it’s a cherished companion. Every guitarist wants to keep their instrument safe, secure, and accessible. While you can buy a guitar stand, creating a DIY guitar stand is a rewarding project that allows you to customize it to your style and needs. Plus, if you’re looking for a high-quality, stylish alternative, we’ll also introduce you to NordicStand—a beautifully designed floor stand that blends form and function. Why You Need a Guitar Stand Leaving your guitar leaning against a wall or resting on a couch is risky. A small bump or slip could lead to damage. A proper guitar stand protects your instrument from accidental falls and provides a dedicated space to display it proudly. A well-made guitar stand also helps:✅ Prevent scratches and dents✅ Keep the neck in good condition✅ Make your guitar easy to grab and play✅ Display your guitar as a piece of art DIY Guitar Stand – Step-by-Step Guide Creating a DIY guitar stand is easier than you might think. With a few basic tools and materials, you can build a functional and attractive stand that suits your guitar and space. Materials Needed: Wooden planks (oak, walnut, or pine) Screws and wood glue Soft padding (felt or cork) Sandpaper Wood stain or paint Measuring tape Drill and saw Step 1: Measure and Cut the Wood Measure your guitar’s height and width to determine the size of the stand. Cut two side supports and a base from the wooden planks. Ensure the base is wide enough to prevent tipping. Step 2: Sand and Smooth the Wood Use sandpaper to smooth out the edges and surfaces. This prevents splinters and gives the stand a professional finish. Step 3: Assemble the Stand Attach the side supports to the base using wood glue and screws. Ensure the angle provides enough support for the guitar's neck. Let the glue dry completely. Step 4: Add Padding Line the contact points with soft padding like felt or cork to prevent scratches on the guitar’s body and neck. Step 5: Finish and Stain Apply wood stain or paint to match your decor. Let it dry completely before placing your guitar on it. Challenges of DIY Guitar Stands While building a DIY guitar stand is rewarding, it comes with some challenges: Stability: Homemade stands may not provide enough stability for heavier instruments. Portability: Most DIY stands are not collapsible or travel-friendly. Durability: Without the right materials, DIY stands may wear down over time. NordicStand – The Perfect Alternative If you prefer a professional-grade stand that combines elegance and functionality, NordicStand is the ideal solution. Designed by the award-winning duo HarritSorensen and manufactured by Openhagen, this floor stand is crafted from sustainable materials and engineered for durability and style. Why NordicStand Stands Out: ✅ Sustainable Materials: Crafted from sustainably sourced wood, aluminum, and lined with oiled cork for a premium look and feel.✅ Collapsible & Portable: Lightweight at just 960 g (2.11 lb) and collapsible to 3 cm (1.18 in), making it easy to carry in a gig bag.✅ Universal Fit: Compatible with most stringed instruments, including acoustic guitars, electric guitars, basses, ukuleles, and mandolins.✅ Strong & Secure: Holds up to 11 kg (25 pounds)—perfect for heavier instruments.✅ Stylish Finishes: Available in Walnut, Oak, and Stained Oak to complement any decor.✅ Non-Slip Base: Ensures stability on any surface, from wood floors to carpet.✅ Innovative Design: Patent-pending design offers a modern, minimalist aesthetic with maximum functionality. Specifications: Weight: 960 g (2.11 lb) Height: 22.5 cm (8.8 in) | Collapsed Height: 3 cm (1.18 in) Base Width: 32 cm (12.6 in) | Collapsed Width: 26 cm (10.2 in) Capacity: Supports up to 11 kg (25 lb) Designed for Musicians On-the-Go NordicStand’s collapsible design makes it perfect for traveling musicians. It fits neatly in a gig bag, ensuring that you always have a secure place to rest your guitar, no matter where you play. DIY or NordicStand – Which One is Right for You? Feature DIY Guitar Stand NordicStand Materials Wood of your choice Sustainable wood, aluminum, oiled cork Portability No Yes (lightweight and collapsible) Stability Depends on design High stability with non-slip base Compatibility Guitar-specific Works with guitars, basses, ukuleles, and mandolins Design Customizable Modern and minimalist Assembly Required No assembly needed Final Thoughts A DIY guitar stand is a fun project that allows you to create a personalized display for your instrument. However, if you’re looking for a stylish, high-quality alternative, NordicStand is the ultimate solution. Its sustainable materials, elegant design, and portability make it a must-have for any musician. Whether you choose to build your own or invest in NordicStand, giving your guitar a proper place to rest will keep it safe and ready for your next performance.
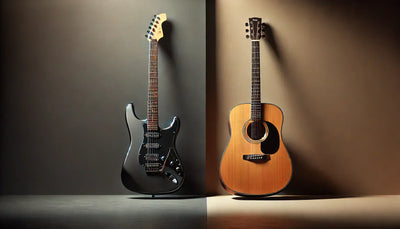
Electric Guitar vs. Acoustic Guitar – Which One Should You Choose?
If you're starting your guitar journey or looking to upgrade, you may be wondering: Should I get an electric guitar or an acoustic guitar? Both...
If you're starting your guitar journey or looking to upgrade, you may be wondering: Should I get an electric guitar or an acoustic guitar? Both have their unique characteristics, playing styles, and ideal use cases. This guide will compare them in terms of sound, playability, cost, versatility, and maintenance to help you make the best decision. 1. What is an Acoustic Guitar? 🎸 An acoustic guitar produces sound naturally through its hollow body, which amplifies the vibrations of the strings. No external amplification is needed, making it perfect for unplugged sessions, singer-songwriter performances, and folk or classical music. Pros of an Acoustic Guitar: ✅ Portable & No Extra Gear Required – Play anywhere without an amp.✅ Rich, Natural Sound – Warm and resonant tones.✅ Great for Beginners – Simple setup with no cables or electronics.✅ Enhances Finger Strength – Slightly thicker strings help build finger muscles. Cons of an Acoustic Guitar: ❌ Less Sound Variety – No distortion, effects, or volume control.❌ Harder to Play for Beginners – Thicker strings can be tough on fingers.❌ Limited Amplification – Sound projection depends on the guitar’s build. 2. What is an Electric Guitar? 🎸⚡ An electric guitar requires an amplifier to produce sound, as its body is solid and doesn’t resonate like an acoustic guitar. It’s commonly used in rock, blues, metal, and jazz due to its ability to modify tones using effects pedals and amplifiers. Pros of an Electric Guitar: ✅ Easier to Play – Lighter strings and lower action make it beginner-friendly.✅ Sound Customization – Use distortion, reverb, and other effects for unique tones.✅ Louder & Adjustable Volume – Ideal for live performances.✅ Versatile for Multiple Genres – Rock, jazz, metal, blues, and more. Cons of an Electric Guitar: ❌ Needs an Amp & Accessories – Requires additional gear to play.❌ More Expensive Setup – Costs more than an acoustic due to electronics.❌ Less Portable – Amplifiers and cables make it harder to travel with. 3. Key Differences Between Electric & Acoustic Guitars Feature Acoustic Guitar Electric Guitar Sound Warm, natural tones Versatile, customizable with effects Ease of Play Thicker strings, requires more finger strength Lighter strings, easier for beginners Portability Fully portable, no amp needed Requires an amp and cables Best For Folk, country, classical, singer-songwriters Rock, blues, jazz, metal, pop Cost More affordable upfront Costs more due to amp and accessories Learning Curve Can be challenging at first Easier to start playing 4. Which Guitar is Best for Beginners? If you prefer a natural sound and want a simple setup, go for an acoustic guitar. If you like rock, blues, or metal and want an easier playing experience, an electric guitar is better. 5. Should You Learn Acoustic Before Electric? There’s a myth that you must learn acoustic guitar first before moving to electric. While acoustic guitars strengthen your fingers, starting with an electric guitar is fine if that's the style you prefer. Choose the one that keeps you motivated to practice! 6. Final Verdict – Which One Should You Buy? Choose an Acoustic Guitar if: You want a natural, unplugged sound and a portable, simple instrument. Choose an Electric Guitar if: You want a customizable sound, easier playability, and love rock or jazz music. Pro Tip: If budget allows, owning both can give you the best of both worlds! 🎸✨ also read: How to Tune a Guitar
How to Take Care of Your Acoustic Guitar: Expert Tips
An acoustic guitar is more than just a musical instrument; it’s an investment, a source of joy, and for many, a lifelong companion. Proper care...
An acoustic guitar is more than just a musical instrument; it’s an investment, a source of joy, and for many, a lifelong companion. Proper care and maintenance are essential to keep your guitar in top shape and ensure it produces the best sound quality. In this blog, we’ll guide you through the essential steps to take care of your acoustic guitar and make it last for years. 1. Store Your Guitar Properly Proper storage is crucial for maintaining your acoustic guitar’s condition. Here are a few tips: Use a Hard Case: A sturdy hard case protects your guitar from temperature changes, humidity, and accidental bumps. Avoid Extreme Temperatures: Never leave your guitar in a hot car or near a heater. Extreme heat can warp the wood, while cold temperatures can cause cracking. Keep It Upright: Use a guitar stand or wall mount to store your guitar upright. This prevents unnecessary pressure on the neck. 2. Maintain Optimal Humidity Levels Wood is sensitive to humidity, and your acoustic guitar is no exception. Improper humidity levels can cause the wood to swell or crack. Ideal Humidity Range: Keep the humidity level between 45% and 55%. Use a Guitar Humidifier: Place a humidifier in your guitar case to maintain a stable environment, especially in dry climates. Avoid Moisture Exposure: Keep your guitar away from damp areas, as excessive moisture can damage the finish and wood. 3. Clean Your Guitar Regularly Dirt and grime can accumulate on your guitar over time, affecting its appearance and sound. Wipe It Down After Playing: Use a soft, lint-free cloth to wipe the strings, fretboard, and body after every session. Use Guitar Polish: Apply a specialized guitar polish to the body to maintain its shine, but avoid overusing it. Clean the Strings: Dirty strings lose their tone quickly. Use string cleaner or rubbing alcohol to remove oils and debris. 4. Change Strings Periodically Strings are the heart of your acoustic guitar, and old strings can make even the best guitar sound dull. How Often to Change Strings: Replace strings every 2-3 months or whenever they sound lifeless. Choose the Right Strings: Use strings designed for acoustic guitars and match the gauge to your playing style. Proper String Installation: When changing strings, ensure they’re wound correctly to avoid slipping and maintain tuning stability. 5. Tune Your Guitar Regularly Keeping your guitar in tune is not only important for sound quality but also for maintaining string tension. Use a Guitar Tuner: A digital tuner ensures accurate tuning and saves time. Check Tuning Before Playing: Always tune your guitar before playing, especially if it’s been stored for a while. 6. Handle with Care How you handle your acoustic guitar directly impacts its longevity. Use a Strap: A guitar strap prevents accidental drops while standing or moving. Avoid Touching the Finish: Oils from your hands can damage the guitar’s finish. Hold it by the neck or body edges. 7. Protect the Fretboard and Bridge The fretboard and bridge are crucial components of your guitar. Regular maintenance ensures their longevity. Condition the Fretboard: Apply lemon oil or fretboard conditioner every few months to prevent dryness and cracking. Inspect the Bridge: Ensure the bridge is firmly attached to the body. If it starts lifting, have it repaired by a professional. 8. Schedule Professional Maintenance Sometimes, your guitar needs expert care that goes beyond regular cleaning. Get a Yearly Check-Up: Take your guitar to a professional luthier once a year for a thorough inspection. Fix Issues Immediately: If you notice any cracks, loose parts, or buzzing sounds, get them repaired promptly. Fret Dressing: Over time, frets may wear down and affect playability. A luthier can file and polish them as needed. 9. Travel with Caution If you travel with your acoustic guitar, take extra precautions to keep it safe. Use a Padded Case: A padded gig bag or hard case provides the best protection. Loosen the Strings: Loosen the strings slightly to reduce tension during long journeys. Handle with Care: Avoid placing heavy objects on the case and ensure it’s stored securely during transit. 10. Avoid DIY Repairs While some minor fixes can be done at home, avoid attempting complex repairs yourself. Mistakes can cause further damage. Always consult a professional for serious issues. Final Thoughts Taking care of your acoustic guitar ensures it remains a joy to play and retains its value over time. By following these maintenance tips, you can enjoy consistent performance and extend the life of your instrument. Whether you’re a beginner or a seasoned guitarist, investing time in proper guitar care is always worth it. Treat your acoustic guitar with the care it deserves, and it will reward you with beautiful music for years to come. By implementing these care practices, your acoustic guitar will not only sound great but also look as good as the day you bought it. Ready to keep your acoustic guitar in top shape? Start following these tips today and let your music shine!

Why a Projector is Better Than a TV: A Simple Guide
Are you deciding between a projector and a TV for your home? Many people stick to TVs because they are familiar, but projectors have some...
Are you deciding between a projector and a TV for your home? Many people stick to TVs because they are familiar, but projectors have some amazing advantages that might surprise you. In this blog, we’ll explain why a projector could be the better choice for your entertainment needs. 1. Bigger Screen for Less Money Projectors can give you a massive screen size for a fraction of the cost of a large TV. Imagine watching movies, sports, or playing video games on a 100-inch or bigger screen—it feels like having a theater at home! While TVs over 75 inches are very expensive, projectors make large screens affordable. 2. Better for Your Eyes Watching a projector can be easier on your eyes compared to a TV. Projectors reflect light off a wall or screen, which is softer and more natural than the direct light from a TV. This reduces eye strain, especially during long viewing sessions. 3. Portable and Space-Saving Unlike a TV, a projector is lightweight and easy to move. You can set it up in different rooms or even take it outside for a backyard movie night. Plus, projectors don’t take up as much space because they can be stored away when not in use. 4. Versatility in Screen Size A TV’s screen size is fixed, but with a projector, you can adjust the size to fit your space. Whether you want a smaller screen for a cozy room or a huge screen for a big party, a projector can adapt to your needs. 5. More Immersive Experience With a projector, you can create a cinematic experience right at home. The large screen fills your field of vision, making movies, games, and shows feel more immersive. It’s perfect for families and gatherings. 6. Great for Multi-Purpose Use Projectors aren’t just for watching movies. You can use them for work presentations, photo slideshows, or even video calls. Many modern projectors connect easily to laptops, phones, and gaming consoles. Conclusion While TVs are popular, projectors offer unique benefits like bigger screens, better eye comfort, and portability. If you want to elevate your home entertainment experience, a projector might be the perfect choice for you. Also read: The Ultimate Guide to 4K Mini Projectors

The Best Way to Learn Guitar: A Complete Guide for Beginners
Learning guitar can feel overwhelming, especially with so many methods, courses, and tutorials available. This guide simplifies the process, breaking down the best way to...
Learning guitar can feel overwhelming, especially with so many methods, courses, and tutorials available. This guide simplifies the process, breaking down the best way to learn guitar so you can build a solid foundation and enjoy steady progress. Whether you're a beginner or returning to guitar after a break, this approach will help you make the most of your learning experience. 1. Start with the Basics Before diving into complex chords and songs, it’s essential to understand the basics. Starting simple helps you build a strong foundation and avoid bad habits. Learn Guitar Anatomy: Familiarize yourself with parts of the guitar, including the fretboard, strings, tuners, and body. Understanding your instrument will help you follow tutorials more effectively. Proper Posture and Hand Positioning: Good posture minimizes strain and enhances your control. Practice holding the guitar and positioning your hands correctly on the fretboard. Basic Finger Exercises: Start with basic exercises to build finger strength, flexibility, and coordination. Simple scales and finger drills are great for getting your fingers accustomed to the fretboard. 2. Choose the Right Guitar and Accessories If you’re serious about learning, invest in a guitar that feels comfortable and sounds good. Your choice will depend on your musical goals and budget. Acoustic vs. Electric Guitar: Beginners usually start with acoustic guitars, which don’t require extra equipment. Electric guitars, however, have a lighter touch and may be easier for some learners to handle. Get a Tuner and Picks: A tuner ensures your guitar always sounds right, while picks are essential for strumming and picking. Starting with medium picks helps you get a feel for the guitar before experimenting with other thicknesses. Other Accessories: A comfortable strap, extra strings, and a metronome are helpful accessories. A metronome, in particular, is invaluable for practicing rhythm. 3. Learn Basic Chords and Strumming Patterns Mastering a few basic chords and strumming patterns early on will let you play countless songs. Essential Chords for Beginners: Start with easy chords like G, C, D, and E minor. These open chords are widely used in popular music and are simple to switch between. Practice Strumming Patterns: A good rhythm is crucial for any guitarist. Experiment with basic strumming patterns, like down-down-up-up-down-up, to develop a natural feel for the beat. Chord Transitions: Practice transitioning smoothly between chords, as this skill is essential for playing songs. Start slow and increase speed as you become more comfortable. 4. Develop a Practice Routine Consistency is key when learning guitar. A structured practice routine will keep you on track and ensure steady progress. Set Goals: Set small, achievable goals, like learning a chord each week or mastering a specific strumming pattern. Short, Regular Sessions: Aim for 15-30 minutes of daily practice instead of one long weekly session. This helps build muscle memory and keeps you motivated. Warm-Up Exercises: Begin each session with warm-up exercises to prepare your hands and fingers, such as finger stretches, scales, or light strumming. 5. Use Online Resources and Apps The internet offers a wealth of resources for beginners, from free videos to interactive apps. Here are some options that can enhance your learning experience: YouTube Tutorials: Many guitar instructors offer beginner-friendly tutorials on YouTube, where you can learn songs, techniques, and exercises at your own pace. Guitar Learning Apps: Apps like Fender Play, Yousician, and JustinGuitar offer structured lessons and interactive features, perfect for self-paced learners. Backing Tracks: Practicing with backing tracks helps you play along with music, improving your timing and rhythm skills. 6. Practice Playing Songs You Enjoy Learning songs you love is one of the best ways to stay motivated and have fun while practicing. Start Simple: Choose songs with a few basic chords and a simple rhythm. “Horse with No Name” by America or “Three Little Birds” by Bob Marley are great for beginners. Slow It Down: When learning a song, play it at a slower pace to nail the chord changes and timing. Gradually increase speed as you become more confident. Break It Down: Focus on learning one section at a time, like the intro or chorus, before moving to the next part. This approach makes songs more manageable and less intimidating. 7. Develop Finger Strength and Dexterity Finger strength is essential for playing chords clearly and holding notes without discomfort. Here are a few techniques to build finger strength: Finger Exercises: Practice exercises like the “1-2-3-4” drill, where each finger presses down a fret in sequence. This improves finger independence and strength. Barre Chords Practice: Although challenging, practicing barre chords builds finger strength and allows you to play more complex songs. Scales and Arpeggios: Scales like the pentatonic scale or simple arpeggios help improve dexterity and prepare you for more advanced techniques. 8. Learn to Read Guitar Tabs and Sheet Music Learning to read guitar tabs (tablature) can greatly expand the range of songs you can play, as tabs are widely available online. Understanding Guitar Tabs: Guitar tabs use numbers to indicate fret positions, making them accessible to beginners. Learning to read tabs lets you pick up melodies and riffs more quickly. Reading Chord Charts: Chord charts are visual representations of where to place your fingers. Familiarizing yourself with these charts can speed up your learning process. Consider Sheet Music: If you’re interested in classical or jazz guitar, learning sheet music may be beneficial. Many online courses cover basic music theory, including how to read sheet music. 9. Join a Guitar Community Connecting with others who share your passion for guitar can be motivating and educational. Local Music Schools and Classes: Enroll in group guitar lessons or join a local music class. This structured environment provides regular feedback and lets you play with others. Online Forums and Social Media Groups: Join guitar forums or social media groups where guitarists share advice, tips, and encouragement. Jam with Friends: Jamming with other musicians, even if they’re not guitarists, is a fun way to improve timing, listening skills, and adaptability. 10. Stay Patient and Enjoy the Journey Learning guitar takes time, so be patient with yourself. Progress may feel slow, but every minute of practice counts. Celebrate your achievements, whether it’s playing your first song or mastering a tricky chord. Final Thoughts Learning guitar is a journey that rewards persistence and passion. By starting with the basics, setting up a structured routine, and using resources like tutorials and apps, you’ll find yourself improving steadily. Remember, the best way to learn guitar is to enjoy each step of the process. With dedication and the right approach, you’ll soon be playing your favorite songs and discovering the joy of music-making. Happy strumming! Also Read: How to Tune a Guitar,

Mastering the B Minor Guitar Tab: A Comprehensive Guide for Beginners
If you're learning to play guitar, one of the essential chords you’ll need to know is B Minor. While many beginners find it challenging, once...
If you're learning to play guitar, one of the essential chords you’ll need to know is B Minor. While many beginners find it challenging, once you master it, you'll have unlocked a gateway to countless songs. In this guide, we’ll break down everything you need to know about the B Minor guitar tab, including finger placement, practice tips, and how to incorporate it into your playing. What is the B Minor Chord? The B Minor chord is a barre chord often played in the second position. It’s frequently used in genres ranging from pop and rock to blues and jazz, making it a fundamental chord for any aspiring guitarist. How to Play B Minor on Guitar Step-by-Step B Minor Guitar Tab (2nd Fret) Index Finger (Barre): Place your index finger across all the strings on the second fret. Middle Finger: Place your middle finger on the third fret of the B string. Ring Finger: Place your ring finger on the fourth fret of the D string. Pinky Finger: Place your pinky on the fourth fret of the G string. Strum: Strum from the A string downwards (avoid hitting the low E string). Why is the B Minor Chord Difficult? Many beginners struggle with barre chords because they require strength and precision. In the B Minor chord, your index finger is responsible for pressing down all six strings on the second fret, which can feel awkward and demanding at first. Tips for Practicing B Minor Start with Partial Barre Chords: If a full barre is too challenging, begin by only pressing down part of the strings (like the first 4 strings). Use the Right Thumb Position: Keep your thumb low on the back of the guitar neck for better leverage. Press Firmly: Ensure you apply consistent pressure across all strings, so none of them buzz or sound muted. Daily Practice: Repetition is key. Practice the chord every day to build the required hand strength and muscle memory. Songs that Use the B Minor Chord Once you’ve mastered the B Minor guitar tab, you can start playing numerous songs. Here are a few popular tracks that incorporate B Minor: "Wish You Were Here" – Pink Floyd "Zombie" – The Cranberries "Hotel California" – Eagles Conclusion The B Minor guitar chord may seem difficult at first, but with regular practice and patience, you'll soon be able to play it confidently. Once you’ve mastered the B Minor, you’ll have a versatile chord under your belt, ready to use in a variety of songs. So, pick up your guitar and start practicing this essential chord today! Also Read, Guitar Tuners, Best Way to Learn Guitar
The Ultimate Guide to Guitar Tuners: How to Tune Your Guitar Like a Pro
Whether you're a beginner picking up the guitar for the first time or a seasoned player, tuning your guitar is an essential skill. A welltuned...
Whether you're a beginner picking up the guitar for the first time or a seasoned player, tuning your guitar is an essential skill. A welltuned guitar is the foundation of great sound, and without it, even the best guitarists can sound out of key. Fortunately, tuning your guitar has never been easier thanks to a variety of guitar tuners available today.In this guide, we’ll explore everything you need to know about guitar tuners. From different types of tuners and how they work to tips for tuning your guitar accurately, this blog will equip you with all the knowledge you need to keep your guitar sounding pitchperfect. What Is a Guitar Tuner? A guitar tuner is a device that helps you adjust the pitch of each string on your guitar to ensure that it’s in tune. Since guitars are stringed instruments, the strings need to vibrate at specific frequencies to produce the right notes. A guitar tuner listens to the note you play and tells you whether it's too sharp (higher than the correct pitch) or too flat (lower than the correct pitch), helping you adjust accordingly.There are several types of guitar tuners available, each with its unique features and advantages. Let's dive into the different types of guitar tuners and how they work. Types of Guitar Tuners There are various types of tuners you can use depending on your needs and preferences. Here’s a look at the most common types of guitar tuners: 1. ClipOn Tuners Clipon tuners are incredibly popular, especially among beginners. They clip onto the headstock of the guitar and detect the vibrations of the strings when you pluck them. The tuner then shows whether the note is sharp, flat, or in tune. Since these tuners rely on vibrations rather than sound, they work well even in noisy environments.Pros: Easy to use Portable and convenient Works in loud surroundings Cons: Can be less accurate compared to other types 2. Pedal Tuners Pedal tuners are commonly used by professional guitarists who perform on stage. They are part of a guitarist’s pedalboard and are activated by stepping on them. Pedal tuners mute the guitar’s output while tuning, ensuring that the audience doesn’t hear the tuning process. They offer high accuracy and are favored by electric guitarists.Pros: Very accurate Mutes sound while tuning Ideal for live performances Cons: More expensive Requires power (usually a 9V battery or an adapter) 3. Handheld Tuners Handheld tuners are standalone devices that can be carried in your guitar case or pocket. They work by listening to the sound of the guitar string and indicating whether it’s sharp, flat, or in tune. Some handheld tuners come with builtin microphones, making them versatile for use with both electric and acoustic guitars.Pros: Affordable and portable Can be used with different instruments Cons: Less convenient in noisy environments 4. AppBased Tuners With the advancement of smartphone technology, appbased tuners have become a popular and accessible option for guitarists. These apps use the phone’s microphone to detect the pitch of the guitar string. While convenient, appbased tuners may not be as accurate as dedicated tuners, especially in loud settings.Pros: Free or inexpensive Convenient (can be used anytime, anywhere) Cons: Dependent on microphone quality May not be reliable in noisy environments How to Tune a Guitar Using a Tuner Now that you know the different types of tuners, let’s walk through the basic steps to tune a guitar using a tuner: Step 1: Set the Tuner to Standard Tuning Most tuners have different settings for various tunings, such as standard, drop D, or alternate tunings. Ensure that your tuner is set to standard tuning (E A D G B E), which is the most common tuning for guitars.Step 2: Tune the Low E String (6th String) Start with the thickest string on the guitar, the low E string (6th string). Pluck the string and check the reading on your tuner. If the tuner shows that the note is too sharp, loosen the tuning peg. If the note is too flat, tighten the tuning peg until the tuner indicates that the string is perfectly in tune.Step 3: Tune the A String (5th String) Once the E string is tuned, move on to the next string, the A string (5th string). Repeat the process by plucking the string and adjusting the tuning peg until the tuner shows the correct pitch.Step 4: Tune the Remaining Strings Continue this process for the remaining strings: D string (4th string) G string (3rd string) B string (2nd string) High E string (1st string) Once all six strings are in tune, your guitar is ready to play. Tips for Accurate Tuning Tune in a Quiet Environment: Tuners can be sensitive to surrounding noise, so it's best to tune your guitar in a quiet place to avoid interference. Tune Up, Not Down: When adjusting the tuning pegs, always tune up to the correct pitch rather than down. This prevents the string from becoming too loose and slipping out of tune. Check Tuning Frequently: Strings can go out of tune quickly, especially during live performances or long practice sessions. Make it a habit to check your tuning frequently. Why Tuning Matters Tuning your guitar is essential for several reasons: Improves Sound Quality: A welltuned guitar produces a pleasant and harmonious sound, enhancing your playing experience. Prevents Frustration: Playing an outoftune guitar can be frustrating and demotivating. Proper tuning ensures that you sound great every time you play. Enhances Musical Development: Tuning your guitar trains your ear to recognize the correct pitch, an essential skill for any musician. Conclusion Tuning your guitar is an indispensable part of being a guitarist, whether you're a beginner or a professional. With the variety of tuners available—ranging from clipon and pedal tuners to handheld and appbased options—there’s a tuner that fits your needs and style. Make sure you choose a tuner that works best for you and practice tuning your guitar regularly to ensure you always sound your best.Investing in a quality guitar tuner and developing the habit of tuning before you play will dramatically improve your sound, making your guitarplaying journey much more enjoyable. Also Read: Electric Guitar vs. Acoustic Guitar, How to Tune a Guitar

The Ultimate Guide to Portable Projectors: Your Go-To Device for Entertainment and Business
Portable projectors have revolutionized the way we enjoy media and conduct presentations. Gone are the days when you needed a bulky, stationary projector to display...
Portable projectors have revolutionized the way we enjoy media and conduct presentations. Gone are the days when you needed a bulky, stationary projector to display your favorite movies or important business slides. Today’s portable projectors are compact, easy to use, and packed with features that make them a must-have gadget. Whether you’re a movie enthusiast, a gamer, or a business professional, a portable projector can enhance your experience in numerous ways. What is a Portable Projector? LightBoks The Smart, wood Projector A portable projector is a compact, lightweight device that projects images, videos, or presentations onto a screen or wall. Unlike traditional projectors, portable projectors are designed for easy transport and use in various environments. They come in various sizes, from pocket-sized models to slightly larger ones that still fit easily in a bag or backpack. Why Choose a Portable Projector? Convenience and Portability The primary advantage of a portable projector is its convenience. You can carry it anywhere, set it up in minutes, and start projecting your content. This makes it perfect for on-the-go presentations, impromptu movie nights, or outdoor events. Versatility Portable projectors can connect to a variety of devices, including smartphones, laptops, tablets, and gaming consoles. This versatility allows you to use them for different purposes, from watching movies and TV shows to gaming and business presentations. Quality and Performance Despite their small size, many portable projectors offer excellent image quality and performance. With advancements in technology, you can now find models that provide high resolution, vibrant colors, and good brightness levels, ensuring a great viewing experience. Key Features to Look For When shopping for a portable projector, consider the following features to ensure you get the best device for your needs: Resolution Resolution is crucial for image quality. Look for a projector with at least 720p resolution. For better clarity and detail, opt for a 1080p or higher resolution. Brightness Brightness is measured in lumens. The higher the lumens, the brighter the image. For indoor use in dimly lit rooms, 1000-1500 lumens are sufficient. For outdoor use or well-lit rooms, consider projectors with 2000 lumens or more. Battery Life For true portability, choose a projector with a built-in battery. Check the battery life to ensure it can last through your movie or presentation without needing a recharge. Connectivity Ensure the projector has multiple connectivity options, such as HDMI, USB, and wireless connectivity like Bluetooth or Wi-Fi. This will allow you to connect it to various devices easily. Portability Consider the size and weight of the projector. It should be small and light enough to carry around comfortably. Some models even come with carrying cases for added convenience. Audio Quality Some portable projectors come with built-in speakers. While these may not match the quality of dedicated speakers, they can be handy for quick setups. Alternatively, look for models with audio output options to connect external speakers. Best Uses for Portable Projectors Home Entertainment A portable projector can transform any space into a home theater. Enjoy movies, TV shows, and sports events on a big screen, whether you’re in your living room, bedroom, or backyard. For an immersive experience, pair your projector with a good sound system and a screen. Gaming For gamers, a portable projector offers a large display for an enhanced gaming experience. Connect your gaming console or PC and enjoy your favorite games on a big screen with vivid colors and sharp details. Business Presentations Portable projectors are ideal for business professionals who need to make presentations on the go. They are easy to set up and provide a clear, professional display of slides and videos, making them perfect for meetings, conferences, and client pitches. Education Teachers and educators can benefit from portable projectors by using them to display educational content in classrooms or during field trips. Their portability makes them a versatile tool for enhancing learning experiences. Travel and Camping For those who love to travel or camp, a portable projector can be a great addition to your gear. Enjoy movies under the stars or share your travel photos and videos with friends and family. Tips for Using a Portable Projector Choose the Right Location Select a flat, stable surface to set up your projector. Ensure the area is dark enough to enhance the image quality. If you’re using it outdoors, wait until after sunset for the best viewing experience. Use a Projection Screen While you can project onto any flat surface, a dedicated projection screen will provide the best image quality. If you don’t have a screen, a white wall or a white sheet can work in a pinch. Adjust the Settings Take some time to adjust the projector settings to optimize image quality. This includes focus, keystone correction, and color settings. Each environment may require different adjustments for the best results. Maintain Your Projector Keep your projector clean and dust-free. Follow the manufacturer’s instructions for maintenance and storage to ensure it remains in good working condition. Popular Portable Projector Models Here are a few highly-rated portable projectors that have received positive reviews for their performance and features: LightBoks: The Smart, Wood Projector the world's only wood projector, a masterpiece of Danish design crafted from sustainable materials. Enjoy a giant 180-inch screen in stunning 1080p HD, versatile Smart Flip technology for vertical and horizontal video, and immersive dual stereo sound. Perfect for movies, gaming, and music, this eco-friendly projector combines functionality with unparalleled beauty and craftsmanship. Shop Now Anker Nebula Capsule II Known for its compact size and excellent image quality, the Anker Nebula Capsule II offers 720p resolution, 200 ANSI lumens, and a 2.5-hour battery life. It also features Android TV, providing access to thousands of apps. LG PF50KA The LG PF50KA offers 1080p resolution, 600 ANSI lumens, and up to 2.5 hours of battery life. It supports wireless screen sharing and has built-in webOS for streaming content directly from the projector. ViewSonic M1 Mini Plus The ViewSonic M1 Mini Plus is a pocket-sized projector with 120 lumens and WVGA (854x480) resolution. It has built-in JBL speakers, a built-in battery with up to 2.5 hours of usage, and Wi-Fi connectivity for streaming. Conclusion A portable projector is a versatile, convenient, and powerful tool that can enhance your entertainment and business experiences. By considering key features like resolution, brightness, battery life, and connectivity, you can find the perfect projector to meet your needs. Whether you’re watching a movie at home, presenting at a meeting, or enjoying a game night with friends, a portable projector can make your content shine on the big screen. Investing in a high-quality portable projector will bring you countless hours of enjoyment and make your life a little more convenient. Choose the right model for your needs, and get ready to be amazed by what this compact device can do.Also read: Why a Projector is Better Than a TV: A Simple Guide
Unleashing the Melodic Potential of Acoustic-Electric Guitars
The acoustic-electric guitar is a marvel in the world of musical instruments, seamlessly blending the warm, rich tones of an acoustic guitar with the amplified...
The acoustic-electric guitar is a marvel in the world of musical instruments, seamlessly blending the warm, rich tones of an acoustic guitar with the amplified power of an electric guitar. Whether you're a seasoned musician or a beginner, the acoustic-electric guitar offers a versatile and dynamic range of sounds that can enhance your musical journey. In this blog, we will delve into the features, benefits, and tips for choosing the right acoustic-electric guitar for you. What is an Acoustic-Electric Guitar? An acoustic-electric guitar is essentially an acoustic guitar equipped with electronic components that allow it to be amplified. This hybrid instrument maintains the traditional body and sound hole of an acoustic guitar but includes pickups, a preamp, and often an onboard equalizer to control the amplified sound. This design enables musicians to enjoy the best of both worlds: the natural resonance of an acoustic guitar and the ability to project their sound to larger audiences without sacrificing quality. Benefits of Acoustic-Electric Guitars Versatility: One of the most significant advantages of an acoustic-electric guitar is its versatility. You can play it acoustically, enjoying the natural, unamplified sound, or plug it into an amplifier or PA system for a louder, more powerful performance. This makes it ideal for various settings, from intimate practice sessions to live concerts. Sound Quality: The built-in electronics of an acoustic-electric guitar are designed to faithfully reproduce the instrument's natural sound when amplified. High-quality pickups and preamps ensure that the tonal characteristics are preserved, providing a clear and rich sound. Convenience: With an acoustic-electric guitar, you no longer need to rely on external microphones for amplification, which can be cumbersome and prone to feedback issues. The onboard electronics streamline the setup process, making it easier to achieve a great sound in any environment. Recording Flexibility: Acoustic-electric guitars offer excellent flexibility for recording. You can record the natural acoustic sound using a microphone or capture the direct signal from the guitar’s output jack. Many musicians use both methods simultaneously to achieve a fuller, more textured recording. Choosing the Right Acoustic-Electric Guitar When selecting an acoustic-electric guitar, several factors should be considered to ensure you find the right instrument for your needs: Body Style and Size: Acoustic-electric guitars come in various body styles and sizes, including dreadnought, concert, jumbo, and parlor. Each style has its unique tonal characteristics and comfort level. For instance, a dreadnought body produces a bold, powerful sound, making it ideal for strumming and flat-picking, while a concert body offers a balanced tone suitable for fingerstyle playing. Tone woods: The choice of toonwoods significantly impacts the sound of an acoustic-electric guitar. Common toonwoods include spruce, cedar, mahogany, and rosewood. Spruce tops are known for their brightness and clarity, while cedar offers a warmer, mellower tone. Mahogany and rosewood are often used for the back and sides, adding depth and resonance to the sound. Electronics: Pay attention to the quality and features of the guitar’s electronics. Look for reputable brands of pickups and preamps, and consider models with onboard tuners and equalizers for greater control over your sound. Some advanced systems even allow you to blend the signal from multiple pickups for enhanced tonal versatility. Playability: The playability of a guitar is crucial, especially for beginners. Ensure that the guitar has a comfortable neck profile, smooth fretboard, and low action (the distance between the strings and the fretboard) to facilitate easy playing. Budget: Acoustic-electric guitars are available in a wide range of prices. Set a budget that aligns with your needs and skill level. While it’s tempting to go for high-end models, there are many affordable options that offer excellent sound and build quality for beginners and intermediate players. Maintenance Tips To keep your acoustic-electric guitar in top condition, follow these maintenance tips: Regular Cleaning: Wipe down the guitar after each use to remove sweat and dirt. Use a soft cloth and guitar-specific cleaning products to keep the finish and hardware in good shape. String Care: Replace strings regularly to maintain optimal sound quality. Clean the strings after playing to extend their lifespan and prevent corrosion. Proper Storage: Store your guitar in a case when not in use to protect it from dust, humidity, and temperature fluctuations. Consider using a humidifier in dry climates to prevent the wood from cracking. Check Electronics: Periodically check the battery and connections of the onboard electronics. Replace the battery as needed and ensure that all components are functioning correctly. Conclusion The acoustic-electric guitar is a versatile and powerful instrument that opens up a world of musical possibilities. Whether you're playing solo, recording in the studio, or performing live, this hybrid guitar offers the perfect blend of acoustic warmth and electric amplification. By understanding its features, benefits, and maintenance needs, you can make an informed decision and enjoy the melodic potential of your acoustic-electric guitar for years to come. also read: 7-String Guitar