
ブログ

The Ultimate Guide to Choosing the Best Guitar Wood Stand for Your Instrument
A guitar is more than just a musical instrument—it is an extension of your creativity, your passion, and often a valuable investment. Whether you own...
A guitar is more than just a musical instrument—it is an extension of your creativity, your passion, and often a valuable investment. Whether you own a beginner acoustic guitar or a premium electric guitar, how you store it matters. One of the most stylish and protective ways to keep your guitar safe is by using a guitar wood stand. In this detailed guide, we will explore everything you need to know about wooden guitar stands, including their benefits, types, materials, and how to choose the best one for your needs. What Is a Guitar Wood Stand? A guitar wood stand is a specially designed holder made from natural or engineered wood that supports your guitar when it is not being played. Unlike wall mounts or metal stands, wooden stands offer a perfect balance between stability, protection, and aesthetic appeal. These stands are designed to safely hold: Acoustic guitars Electric guitars Bass guitars Classical and nylon-string guitars Wooden guitar stands are commonly used in homes, recording studios, music shops, and performance stages. Why a Guitar Wood Stand Is Better Than Other Stands When compared to plastic or metal guitar stands, wooden stands offer several advantages: 1. Stronger and More Stable Wood is naturally heavier and more solid, which prevents your guitar from tipping over. This is especially important for expensive instruments. 2. Safe for Guitar Finish Many plastic and rubber stands contain chemicals that can react with your guitar’s finish over time. A high-quality wooden guitar stand with felt padding prevents scratches, discoloration, and damage. 3. Premium Look A guitar displayed on a wooden stand looks professional and elegant. It enhances the beauty of both the guitar and your room. 4. Long-Lasting Durability Wooden stands don’t bend or crack like plastic and don’t rust like metal. With proper care, they can last for decades. Types of Guitar Wood Stands 1. A-Frame Wooden Guitar Stand Compact and foldable, this type is perfect for home use and travel. It holds the guitar at a slight angle for easy access. 2. Vertical Wooden Guitar Stand This stand holds the guitar upright and is perfect for daily use. It saves space and keeps your guitar ready to play. 3. Multi-Guitar Wooden Rack Designed to hold multiple guitars at once, ideal for studios, music schools, or collectors. 4. Display-Style Wooden Guitar Stand Made for showcasing premium guitars in showrooms or home studios. Best Wood Types Used in Guitar Stands High-quality guitar wood stands are typically made from: Oak – Very strong and durable Walnut – Rich, dark finish Bamboo – Eco-friendly and lightweight Maple – Smooth texture and strong build Plywood (engineered wood) – Affordable yet sturdy The better the wood, the longer the stand lasts. How a Guitar Wood Stand Protects Your Guitar A premium guitar wooden stand includes: Soft felt or foam padding Anti-slip rubber feet Balanced weight distribution This ensures: No scratches No pressure marks No accidental falling This is extremely important for glossy or nitro-finished guitars. Why Guitarists Prefer Wooden Stands Professional musicians prefer wooden guitar stands because they: Look better on stage Keep instruments stable Do not damage guitar paint Are easy to use Whether you play rock, jazz, blues, or acoustic music, a wooden stand is a professional choice. How to Choose the Best Guitar Wood Stand When buying a wooden guitar stand, check: Weight capacity Padding quality Base width Guitar compatibility Wood finishing Portability A good guitar wood stand should hold your guitar securely without wobbling. Guitar Wood Stand for Home and Studio At home, a wooden guitar stand keeps your guitar within reach so you can practice more. In studios, it keeps instruments safe and organized. On stage, it adds elegance while preventing accidents. Final Thoughts A guitar wood stand is not just a stand it’s an essential accessory for every guitarist. It protects your guitar, enhances your space, and reflects your love for music. If you own a guitar, investing in a high-quality wooden guitar stand is one of the smartest decisions you can make.also read: How to Build a DIY Guitar Stand – Plus the Perfect Alternative!

Why an Electric Guitar Case Actually Matters
Electric guitars often look strong and rugged, especially compared to acoustic guitars, but they’re actually quite sensitive to their surroundings. Wood reacts to humidity, metal...
Electric guitars often look strong and rugged, especially compared to acoustic guitars, but they’re actually quite sensitive to their surroundings. Wood reacts to humidity, metal reacts to moisture, and sudden temperature changes can push different parts of the guitar in opposite directions. Even small shifts in the neck or fretboard can affect how the guitar feels and sounds. Many players only think about protection when something goes wrong, like a dent during travel or a sudden buzz caused by a warped neck. But the truth is that prevention is much easier than fixing damage later. A solid case creates a stable, controlled environment around your guitar, slowing down the effects of climate changes and reducing the chances of physical accidents. Storing your electric guitar in a proper case also keeps dust away. Dust may seem harmless, but over time it can affect electronics, collect inside the pickups, or settle into hard-to-clean corners. A case helps your guitar stay cleaner and reduces the need for frequent deep maintenance. Even inside your home, accidents happen someone knocks the stand, a pet bumps into it, or the guitar slips off a couch. A case acts as a shield in all these situations. So, whether you only play at home or carry your guitar outside often, a well-built case is a long-term investment in the instrument’s health. A Practical Example: The NordicCase Dual-Purpose Case A helpful example of how modern guitar cases are designed is the NordicCase Dual-Purpose Case. Shop Now Instead of being built specifically for one type of guitar, it’s shaped to accommodate both electric and acoustic models by using an adjustable interior. This flexibility makes it practical for players who switch between instruments or those who want one case that fits different needs. Its hard shell is made to withstand daily use, and the wheels make it easier to move around without carrying all the weight by hand. The collapsible design also helps with storage, especially in smaller apartments or studios where space is limited. These small but thoughtful features show how guitar cases today are not just about protection but also about convenience and everyday usability. You don’t need to look at it as a recommendation it simply serves as a good reference for understanding the direction in which guitar case designs are evolving. Modern cases now consider mobility, space efficiency, and multi-purpose usage, and this one is a clean example of that trend. Understanding What to Look for in a Good Case When choosing a case, the outer shell should always be one of the first things you check. Hard shells made from polycarbonate, ABS, or similar materials offer sturdy protection against bumps, drops, and general rough handling. If you often travel through crowded spaces or commute with your guitar, this kind of shell can save you from a lot of stress. Inside the case, build quality matters just as much. Padding should be thick, supportive, and shaped to match the contours of your guitar. A good case ensures that the guitar doesn’t move around when you tilt or lift it. Even a tiny amount of movement can lead to scratches or pressure marks over time, especially on glossy or delicate finishes. Another thing to consider is how the case handles climate. Some cases seal better than others, helping create a more consistent internal environment. If you live somewhere with extreme humidity or dryness, this becomes even more important. Simple additions like keeping silica gel packets or a small guitar humidifier inside can help balance moisture levels too. Portability Makes a Big Difference If you take your guitar out frequently, comfort and mobility become essential. Cases with wheels, comfortable handles, or backpack straps make life much easier. When you're walking long distances or navigating through airports, these details add up and can make the difference between a smooth experience and a tiring one. The weight of the case also matters. A very heavy case may offer protection, but it can become a burden over time. Modern designs try to balance durability with lighter materials so the user doesn’t feel weighed down. Storage features also fall under portability. Having internal pockets or compartments for cables, tuners, straps, and accessories means you don’t need to carry additional bags. It keeps all your essentials in one place and makes last-minute packing less stressful. Long-Term Guitar Care Starts With Better Protection Using a case consistently helps extend the life of your guitar. Less exposure to dust means fewer issues with electronics. Better climate stability means fewer problems with neck alignment or fretboard changes. And physical protection means your guitar stays free from dents, cracks, and scratches. For players who own multiple guitars, using cases also helps with organization. It keeps your instruments stored neatly, reduces clutter, and makes the room feel safer especially if you have kids or pets around. Even if you think your guitar is safe leaning on a stand, one unexpected slip can cause expensive damage. A case, on the other hand, absorbs impact and minimizes risks even in unlikely situations. Final Thoughts A guitar case is more than just a box it’s a protective home for your instrument. It keeps the guitar clean, shields it from environmental stress, makes travel easier, and reduces the need for major repairs in the long run. You don’t need the most expensive or fancy option, just something reliable and comfortable to use. With modern designs improving every year, cases like the NordicCase simply help show what’s possible: thoughtful storage, adjustable interiors, better mobility, and stronger protection. Whether you’re a beginner or a long-time guitarist, choosing a case that suits your lifestyle ensures your electric guitar stays in its best condition for years to come.

Cool Guitar Picks: Features, Tonewoods & Sound Innovation
Discover cool guitar picks and their unique features from tonewoods and grip to design and durability. Explore SixTone™ for the ultimate sensory sound experience. When...
Discover cool guitar picks and their unique features from tonewoods and grip to design and durability. Explore SixTone™ for the ultimate sensory sound experience. When it comes to guitar playing, every detail matters, from the strings you choose to how you hold your pick. While often overlooked, guitar picks play a huge role in shaping tone, comfort, and playing style. Cool guitar picks aren’t just about aesthetics; they combine design innovation, material science, and ergonomic precision to enhance your performance. Let’s dive into the features that make modern guitar picks truly stand out. 1. Ergonomic Grip Designs Cool guitar picks often feature textured surfaces or ergonomic grips that help prevent slipping during intense playing sessions. Whether you’re sweating under stage lights or practicing for hours, a non-slip surface gives you more control and confidence in your strumming and picking. 2. Unique Materials Gone are the days of simple plastic picks. Today’s cool guitar picks are made from varied materials such as nylon, celluloid, metal, wood, and even carbon fiber. Nylon picks offer flexibility and warmth. Metal picks give a bright, punchy tone. Wood and carbon fiber add a unique tactile feel and resonance. Each material changes how your guitar sings giving you a chance to fine-tune your tone to perfection. A Sensory Experience with SixTone™ For guitarists who appreciate craftsmanship as much as sound, SixTone™ takes the humble pick to an entirely new level. Their Set the Tone of Your Home™ collection features six hand-polished guitar picks, each crafted from a distinct tonewood sourced from different corners of the world. Every pick offers a unique tonal character and tactile feel, letting you explore a spectrum of sounds with your instrument. The set arrives in a magnetic, foam-inlaid display box elegant, reusable, and designed for display. Each pick is clearly labeled, showcasing its wood origin and natural grain, while a free vegan leather pick case adds practical charm for players on the move. Thoughtfully designed in Denmark by an award-winning designer, SixTone embodies both sustainability and sophistication with zero plastic and 100% eco-conscious materials. Whether you’re a dedicated player, a collector, or searching for a truly memorable gift, SixTone’s six-wood collection offers a sensory journey through sound, texture, and design reminding us that sometimes, the smallest details create the biggest impressions. 3. Innovative Shapes and Sizes Modern picks come in different shapes and edge styles for every type of guitarist. Teardrop and jazz shapes allow for fast, precise playing. Triangular picks provide multiple picking edges. Rounded tips offer smoother strumming tones, while sharp tips bring attack and clarity. Having a variety of shapes lets players experiment and find their perfect match for rhythm or lead. 4. Variable Thickness Options Pick thickness dramatically affects both tone and playability. Thin picks (around 0.46 mm) deliver a lighter, brighter sound ideal for strumming. Medium picks balance flexibility and control perfect for mixed styles. Heavy picks (1.0 mm and above) offer a fuller tone and precision for solos and lead work. Many cool picks even come with tapered edges or variable thickness designs to combine the best of both worlds. 5. Enhanced Aesthetic Appeal Let’s face it style matters. Many guitarists love picks that reflect their personality. Cool designs feature vivid colors, engraved artwork, glow-in-the-dark effects, or natural wooden finishes that look stunning under stage lighting. It’s not just about looks the finish and coating can also improve grip and durability. 6. Durability and Longevity High-quality picks now use engineered polymers, premium tonewoods, and wear-resistant coatings that last far longer than traditional ones. Some are even heat-treated or laser-finished for extra smooth edges, minimizing string wear and maintaining consistent tone over time. 7. Eco-Friendly and Customizable Options Sustainability has entered the guitar world too. Some modern picks are made from biodegradable materials or recycled components, giving eco-conscious players an ethical choice. Additionally, customizable designs allow players to personalize thickness, texture, and shape a perfect blend of performance and personality. Final Thoughts A cool guitar pick might be small, but its impact on your playing is massive. Whether you crave precision, comfort, tone variety, or visual flair, the right pick enhances your connection to your instrument. And with innovative designs like SixTone’s handcrafted tonewood collection, guitar picks have truly evolved into artistic, functional, and collectible tools that inspire more playing, more listening, and deeper musical connection.Also read: Best Earbuds Under $200

Best Earbuds Under $200: Comfort, Innovation & Everyday Performance
The search for the best earbuds under $200 is more exciting today than ever before. With technology advancing rapidly, this price range now offers features...
The search for the best earbuds under $200 is more exciting today than ever before. With technology advancing rapidly, this price range now offers features that were once exclusive to premium models. You don’t have to spend $300–$400 to enjoy crystal-clear sound, reliable noise cancellation, long battery life, and stylish designs. Whether you’re an everyday music lover, a frequent traveler, a work-from-home professional, or even a light sleeper who struggles with noise at night, the sub-$200 category offers something for everyone. In this guide, we’ll break down what to look for in a great pair of earbuds, why this price range matters, and highlight one innovative option that is changing the way people use earbuds—not just for music, but also for sleep and relaxation. Why Choose Earbuds Under $200? It’s easy to think that the best audio products are always the most expensive, but that’s not always the case. Earbuds under $200 strike the perfect balance between performance and affordability. Here’s why: Flagship Features at Midrange Prices: Many earbuds in this category come with Active Noise Cancellation (ANC), high-quality microphones, and immersive sound that rivals premium models. Daily Comfort: Sub-$200 earbuds are often lighter and designed for long wear, making them better suited for extended listening sessions or all-night use. Durability Without Overpaying: Sweat and splash resistance, sturdy charging cases, and reliable build quality ensure longevity without breaking the bank. Versatility: From music and podcasts to movies, calls, and even sleep, earbuds at this price point cover every lifestyle need. This is why the $100–$200 range has become a sweet spot for buyers who want value without compromise. Features to Look for in the Best Earbuds Under $200 Before making a purchase, it’s worth knowing the key features that separate great earbuds from average ones: Sound Quality The most important factor. Look for earbuds with balanced tuning—clear vocals, strong bass, and clean highs. Many in this category now offer studio-quality audio with minimal distortion. Noise Cancellation Hybrid ANC technology, which combines digital noise blocking with physical isolation, is becoming standard under $200. This ensures you can enjoy music or focus even in noisy environments. Comfort & Fit Earbuds should feel weightless and sit securely in the ear without causing pressure. A good ergonomic design ensures you can wear them for hours—or even sleep with them—without discomfort. Battery Life A strong benchmark is 6–8 hours of playback per charge, with additional power from the charging case. Some models even display exact battery percentages for convenience. Connectivity Bluetooth 5.3 and above offers stable connections, faster pairing, and low latency—essential for video calls, streaming, and gaming. Water & Sweat Resistance An IPX rating (e.g., IPX5) ensures earbuds can handle workouts, light rain, and daily wear without issues. Side-Sleeper Earbuds: Redefining Earbuds Under $200 While many earbuds in this range focus only on music and calls, Side-Sleeper Earbuds by Openhagen have taken a completely new approach. Designed in Denmark with a patent-pending ergonomic shape, Side-Sleeper Earbuds are the world’s first earbuds created for both sleep and music streaming. At just 2.5g per bud, they are incredibly lightweight and molded for side-sleepers, so you can lie on your pillow without any pressure or discomfort. Their Hybrid Active Noise Cancellation combined with physical isolation makes them ideal for snore-blocking and restful nights, while their <30ms low-latency mode delivers smooth, studio-quality sound for music, movies, and gaming. Equipped with a 4-microphone ANC array for crystal-clear calls, an IPX5 sweat-resistant design, and up to 8 hours of battery life per charge (with a digital display charging case), Side-Sleeper Earbuds offer an all-in-one solution for everyday listening, relaxation, and stress relief all for under $200. The Value of Innovation in Midrange Earbuds The release of products like Side-Sleeper Earbuds proves that innovation isn’t limited to flagship categories. In fact, many of the most exciting features in earbuds—such as invisible designs, ultra-lightweight builds, and multifunctional uses are emerging in this midrange price bracket. For consumers, this means more choice and better value. Instead of paying extra for brand names alone, you can find truly practical solutions that improve daily life whether you’re listening during a commute, relaxing before bed, or blocking out distractions at work. Final Thoughts Choosing the best earbuds under $200 is about finding the right balance of comfort, sound quality, and innovation. Today’s midrange earbuds offer far more than basic listening—they’re tools for sleep, focus, fitness, work, and entertainment. Among these, Side-Sleeper Earbuds stand out as a revolutionary option. With their side-sleeper-friendly design, snore-blocking noise cancellation, and powerful all-day performance, they’re more than just earbuds, they’re a lifestyle upgrade. So, if you’re looking for earbuds that combine premium features, everyday comfort, and a price under $200, Side-Sleeper Earbuds should be at the top of your list.Also read: How to Connect Phone to Speaker Bluetooth

How to Connect Phone to Speaker Bluetooth: Complete Step-by-Step Guide
Bluetooth speakers have become a must-have gadget for music lovers. They’re portable, stylish, and free you from the mess of tangled wires. Whether you’re relaxing...
Bluetooth speakers have become a must-have gadget for music lovers. They’re portable, stylish, and free you from the mess of tangled wires. Whether you’re relaxing at home, heading outdoors, or setting the mood at a party, a Bluetooth speaker ensures you enjoy quality sound anytime, anywhere. But if you’ve just bought one, you might be wondering: How do you actually connect your phone to a Bluetooth speaker? Don’t worry it’s easier than you think. Why Bluetooth Speakers Are So Popular The popularity of Bluetooth speakers comes from their ease of use. Unlike wired speakers that need cables or adapters, Bluetooth models work wirelessly with almost any smartphone. They’re small enough to carry in a bag but powerful enough to fill a room with sound. And with newer Bluetooth versions, connections are faster, more stable, and deliver much better audio quality than before. How to Connect Phone to Speaker Bluetooth Here’s a simple step-by-step process anyone can follow: Turn on the speakerSwitch on your Bluetooth speaker and check if it’s in pairing mode. Most speakers indicate this with a flashing LED light or a short chime. Enable Bluetooth on your phone On Android: Go to Settings > Bluetooth and switch it on. On iPhone: Open Settings > Bluetooth and toggle the slider to enable it. Select your deviceYour phone will scan for nearby Bluetooth devices. Find your speaker’s name on the list and tap it. Complete pairingOnce connected, your phone will display a confirmation message, and the speaker may play a tone. After the first time, your phone will usually auto-connect whenever the speaker is on. Play your favorite audioOpen your music app, podcast, or video, and enjoy crystal-clear sound without wires. Quick note: If the speaker was paired with another phone before, you may need to reset or hold the pairing button again. Troubleshooting Tips Speaker not showing up? Keep it close to your phone and check if it’s still in pairing mode. Sound keeps breaking? Stay within 8–10 meters of the speaker for the best signal. Already connected elsewhere? Disconnect or forget the device from the other phone first. VAVIA™: A Different Kind of Bluetooth Speaker While most Bluetooth speakers push sound in one direction using cone drivers, VAVIA™ takes a unique approach. It uses surface vibration technology to spread audio evenly across the room, creating a 180° immersive sound field. Instead of a single “sweet spot,” you feel surrounded by music wherever you stand. VAVIA™ also stands out for its eco-friendly design. Built with solid oak, anodized aluminum, and a woven acoustic fabric, it looks like a piece of modern décor while being sustainable and durable. It’s especially great for genres like acoustic, jazz, and vocals where clarity and warmth matter more than just bass. Final Thoughts Now you know exactly how to connect phone to speaker Bluetooth — a process that takes only a few seconds. From there, you can enjoy your playlists, podcasts, or movies without worrying about messy wires. For everyday use, a simple Bluetooth speaker will do the job perfectly. But if you want an immersive sound experience with modern design and sustainable materials, advanced speakers like VAVIA™ show how far audio technology has evolved. Whether you’re hosting friends, enjoying a workout, or just relaxing with your favorite tracks, connecting your phone to a Bluetooth speaker ensures your world is always filled with great sound. Also Read: Why the Best Party Bluetooth Speaker Delivers a Bloom of Sound

Skip the Boom: Why the Best Party Bluetooth Speaker Delivers a Bloom of Sound
When you’re planning a party, whether it's an impromptu get-together with friends or a carefully curated event, the music is everything. The right playlist sets...
When you’re planning a party, whether it's an impromptu get-together with friends or a carefully curated event, the music is everything. The right playlist sets the vibe — but without the right party Bluetooth speaker, even the best tracks can fall flat. The speaker you choose affects not only the volume but the ambience, energy, and connection between your guests. Today’s market is flooded with speakers that boast loudness and bass, but is that really what makes a speaker party-ready? More often than not, sound quality and audio dispersion are far more important than raw power — and that’s where many hosts go wrong. Let’s dive into what really makes a great party Bluetooth speaker, and why the trend is shifting from "boom" to "bloom." What Should a Party Bluetooth Speaker Actually Do? Sure, it should be loud enough to fill a room, but that’s just the start. A true party-ready Bluetooth speaker should: Fill the space evenly — not just blast from one direction. Handle a range of music styles — from deep bass to crisp vocals. Blend into your environment without clashing with your décor. Be portable, wireless, and easy to set up on the fly. Provide consistent sound, no matter where your guests are standing or sitting. Too often, speakers focus on bass-heavy output — which might sound impressive at first but quickly turns into a shouting match between guests and the beat. That's fun at a rave, but not ideal for a house party, rooftop chill, or garden hangout. Boom vs. Bloom: Understanding the Sound Profile Most Bluetooth speakers use traditional cone drivers that push air to produce sound. The result is usually directional and focused audio that sounds best directly in front of the speaker. Move to the side, and suddenly you’re hearing muffled or imbalanced sound. This is known as the "sweet spot" problem. That’s where the concept of bloom-style sound enters — a sound profile designed to spread and resonate instead of blast and bounce. Think of it as sound that grows out into the room like ripples on water. It wraps around people, rather than punching through them. Bloom-style sound is perfect for parties where: People are moving around and socializing You want clear vocals and detail in music Volume matters, but clarity matters more VAVIA™ by Openhagen: A New Style of Party Speaker One excellent example of this bloom-style sound in action is the VAVIA™ Portable Bluetooth Speaker by Openhagen. While not your typical "party animal" speaker, VAVIA™ offers something rare — immersive, even sound through its patent-pending DML (Distributed Mode Loudspeaker) technology. Instead of a traditional driver, it uses a vibrating flat panel to project a 180° audio field, so everyone hears the same quality no matter where they are in the room. It also doesn’t look like a speaker. With its solid oak frame and acoustic linen face, it blends into any modern or minimalist décor. Hang it on the wall like art, or let it stand like a photo frame — it’s the perfect audio companion for design-conscious hosts. How to Choose the Right Party Bluetooth Speaker for Your Space When choosing your next speaker, consider the type of space you’ll use it in: For indoor parties, opt for speakers that offer warm mids and clear highs, so you’re not sacrificing conversation for background music. For outdoor or larger spaces, consider a speaker with 360° sound or wide-dispersion capabilities. If you're hosting frequently, invest in a speaker that balances style and sound — one that sounds just as good at low volumes as it does when the energy’s high. And don’t forget: Battery life matters (look for 6–10 hours minimum) Bluetooth range should ideally be 30ft+ Easy controls make your life much easier while entertaining Music That Connects, Not Competes Ultimately, a good party Bluetooth speaker shouldn't steal the spotlight — it should set the stage. Music is the emotional undercurrent of any gathering. If your speaker sounds harsh, too bass-heavy, or only plays well in one spot, it creates more friction than fun. Speakers like VAVIA™ are changing the game — proving that party sound can be immersive, clear, stylish, and beautifully balanced. It's not about the loudest speaker. It's about the most thoughtful one. Final Thoughts Whether you’re hosting game night, brunch, a gallery opening, or just a relaxed night with friends, the party Bluetooth speaker you choose plays a key role in shaping the vibe. Go beyond the boom. Choose a speaker that blooms. Let your music breathe, flow, and bring people together — just as it was meant to. Also read: How to Play “Stand by Me” on Guitar

How to Hold a Guitar Pick: The Ultimate Beginner-to-Advanced Guide
Whether you're strumming your favorite chord progression or shredding a complex solo, one small but mighty tool plays a vital role in your tone and...
Whether you're strumming your favorite chord progression or shredding a complex solo, one small but mighty tool plays a vital role in your tone and technique—the guitar pick. For many beginners, holding the pick feels awkward at first, and even intermediate players sometimes develop bad habits that hinder their progress. In this comprehensive guide, we'll walk you through how to hold a guitar pick correctly, why it's important, how your grip affects your playing, and how to tailor your technique for different styles like rock, jazz, blues, and metal. Why the Guitar Pick Matters Before diving into the technique, let’s understand why proper pick handling matters: Sound Control: Your pick affects your tone, attack, and dynamics. Speed & Precision: A proper grip allows for efficient, accurate picking. Comfort & Endurance: Correct technique reduces hand fatigue and injury risk. Versatility: Holding your pick right lets you switch easily between strumming and picking. Now let’s start with the basics. Step-by-Step: How to Hold a Guitar Pick Properly Step 1: Choose the Right Pick Your pick should match your playing style. Here are the key factors: Thickness (Gauge): Thin (0.38–0.60 mm): Great for strumming; flexible but less control. Medium (0.60–0.85 mm): Good balance for both strumming and picking. Heavy (0.85–1.20+ mm): Best for lead guitar and articulate playing. Shape: Standard Teardrop: Most common and versatile. Jazz III: Smaller, sharper for precision. Triangle: Larger, ideal for bass or players with big hands. Material: Nylon: Flexible and grippy. Celluloid: Traditional tone, smooth feel. Tortex/Delrin: Durable with good grip. Choose a pick that feels comfortable and suits your musical goals. Step 2: Form the Grip Relax Your Hand: Start with your picking hand relaxed, fingers naturally curled as if you're holding a small object. Thumb Placement: Place the pick on the side of your index finger (not the pad). Lay your thumb flat over the pick so it holds it in place. The pointy tip of the pick should face out, perpendicular to your thumb. Index Finger Position: The index finger should curl slightly behind the pick. Don’t pinch too hard—just enough pressure to keep it stable. Expose the Tip: Let only about ¼ inch of the pick protrude from between your fingers. Too much pick = floppy, imprecise playing. Too little = pick may slip or dig in too deeply. Step 3: Pick Angle and Wrist Position Pick Angle Hold the pick at a slight angle to the string—about 10–15 degrees tilted. This helps the pick glide over the strings smoothly rather than get caught. Avoid a perfectly flat angle unless you want a sharp, aggressive attack (common in metal or hard rock). Wrist Motion Use your wrist to strum or pick—not your elbow. Keep your wrist loose and relaxed. For fast alternate picking, a combination of wrist and slight forearm rotation is ideal. Visual Reference: The "Coin Method" If you’ve ever held a coin to flick it, that’s roughly how your fingers should hold the pick. Try holding a coin and mimicking a strumming motion. Then switch to the pick—same idea, just more finesse. How NOT to Hold a Guitar Pick (Common Mistakes) Here are some common bad habits that can lead to poor technique or discomfort: Too Much Tip Exposed: Leads to loss of control. Death Grip: Holding the pick too tightly causes hand tension and fatigue. Using Fingertips Instead of Pad: Less stability. Straight, Rigid Wrist: Limits speed and causes strain. Floppy or Wobbly Pick: Indicates an unstable grip—usually too light or too much tip exposed. Adjusting Your Grip for Different Techniques Strumming Chords Use a medium or thin pick. Hold the pick more loosely for a flowing motion. Keep the pick angled slightly and let it glide across the strings. Lead Playing / Solos Use a heavier pick for control. Grip more firmly for accurate attacks. Use alternate picking: down-up-down-up motion. Hybrid Picking (Pick + Fingers) Hold the pick normally with thumb and index. Use middle and ring fingers for plucking strings. Works well in country, blues, and fusion styles. Economy Picking / Sweep Picking Angle the pick slightly downward for fluid string transitions. Use wrist and forearm rotation for sweeping motion. Use a jazz-style grip for tight control. Tips for Beginners Practice Slowly: Accuracy first, speed later. Mirror or Video Feedback: Record yourself to check hand posture. Use a Metronome: Helps with rhythm and consistency. Try Different Picks: Your preferences may change as you develop. Be Patient: It may feel weird at first—stick with it! Advanced Tips: Refining Your Pick Technique Pick Slanting Used in advanced picking styles, especially alternate and economy picking. Downward Slanting: Pick slants down toward the floor; good for downward string changes. Upward Slanting: Pick slants up; good for upward string changes. Two-Way Pick Slanting: Combines both—ideal for speed picking. This technique minimizes resistance and improves string-switching accuracy. Rest Stroke vs. Free Stroke Free Stroke: Pick passes through string without hitting the next—good for speed. Rest Stroke: Pick stops/rests on next string—adds control and dynamics. Classical guitarists use these terms, but they apply to pick users too. Training Exercises to Improve Pick Control Down-Up Picking on One String Use a metronome at 60 bpm. Play eighth notes (down-up-down-up). Focus on consistency and tone. String Skipping Pick strings 6 → 4 → 2 and back. Helps improve accuracy and grip control. Scale Runs Play scales slowly with alternate picking. Use a mirror to monitor your hand movement. Tremolo Picking Rapid alternate picking on one note. Builds wrist speed and pick control. What the Pros Do (Examples) Eddie Van Halen: Held the pick between thumb and middle finger to free up index for tapping. John Petrucci (Dream Theater): Uses Jazz III picks and two-way slanting for blazing speed. James Hetfield (Metallica): Downstrokes with firm grip for aggressive rhythm playing. Andy McKee (Acoustic fingerstyle): Rarely uses a pick—shows it’s optional for some genres. There’s no one-size-fits-all method, but all professionals start with a solid foundation. FAQ: Quick Answers for Common Questions Q: Should I use a pick or fingers?A: Depends on your style. Pick is better for speed and precision; fingers offer dynamics and texture. Q: My pick keeps slipping—what should I do?A: Try a grippier pick (e.g., Tortex or textured grip), or adjust your pressure and angle. Q: Can I play acoustic guitar with a pick?A: Absolutely! It helps with strumming and articulate picking. Q: Is there a “wrong” way to hold a pick?A: Only if it causes discomfort or limits your technique. Experiment, but aim for a stable, relaxed grip. Final Thoughts Holding a guitar pick may seem like a small detail, but it has a massive impact on your playing. From tone to technique, speed to stamina, everything is influenced by how you grip that little triangle of plastic. Whether you’re strumming folk ballads, playing jazz standards, or melting faces with metal solos, your pick technique is the bridge between your creative ideas and the sounds your guitar makes. Take the time to learn it right—and your playing will soar. Also read: Why Changing Guitar Strings Matters

How Often to Change Guitar Strings: The Ultimate Guitar Maintenance Guide
When was the last time you changed your guitar strings? If you’re unsure, your tone might already be suffering. Many guitarists—especially beginners—don’t realize how big...
When was the last time you changed your guitar strings? If you’re unsure, your tone might already be suffering. Many guitarists—especially beginners—don’t realize how big of a role strings play in their sound, feel, and overall guitar experience. Just like a car needs regular oil changes, your guitar needs fresh strings to perform at its best. In this comprehensive guide, we’ll cover everything you need to know about how often to change guitar strings, why it matters, how to extend their lifespan, and how different types of players and guitars require different approaches. Why Changing Guitar Strings Matters More Than You Think Over time, guitar strings lose their brightness, flexibility, and tone. This happens due to a combination of finger oils, sweat, dead skin, dust, friction, and even humidity or air exposure. Once strings start degrading, your guitar’s: Tone becomes dull Tuning becomes unstable Strings feel rough or sticky Intonation suffers Playing becomes less enjoyable Regular string changes are one of the simplest yet most effective ways to make your guitar sound fresh and responsive again. How Often to Change Guitar Strings: A Detailed Breakdown Let’s explore the ideal timeline for changing strings depending on how often and how intensely you play. 1. Beginners or Casual Players (Play 1–2 times a week) Recommended: Change every 3–4 months If you strum a few songs on weekends or play occasionally, your strings can last a bit longer. However, even if you don’t play much, the metal still corrodes over time due to moisture in the air and finger oils. Pro Tip: If your strings look dark or feel stiff, it’s time for a change—even if you haven’t played much. 2. Intermediate Players (Play 3–5 times a week) Recommended: Change every 1–2 months You’ll start noticing that after about a month or so of regular practice, your tone fades and the strings start feeling “worn.” Tuning may also become less stable. This is the perfect time to refresh your set. Pro Tip: Clean your strings after every session to squeeze out extra life from them. 3. Frequent Players (Daily Practice or Jamming) Recommended: Change every 2–4 weeks If you’re practicing scales, playing gigs, or just jamming daily, you’ll wear out your strings quickly. For electric guitarists, aggressive bending and fast finger movements wear down the winding. Acoustic players will notice tonal dullness and squeaky slides. Pro Tip: Invest in coated strings like Elixir or D'Addario EXP for extended durability. 4. Performers & Gig Musicians Recommended: Change strings every 1–2 weeks, or before every gig Performance-grade tone and tuning stability require fresh strings. Professionals often change strings before every show to avoid string breaks or tonal inconsistencies on stage. Pro Tip: Always carry a backup set. Live gigs can get sweaty and high energy—fresh strings are non-negotiable. 5. Studio Recording Artists Recommended: Change before every session In the studio, microphones pick up every detail. Dull or worn strings can ruin an otherwise great take. Clean tone, perfect sustain, and intonation are crucial for recording sessions, which is why many pros restring right before recording. Pro Tip: Stretch your new strings and retune multiple times before hitting "record" to prevent slippage. Factors That Affect How Often You Should Change Strings Changing strings isn't just about how much you play. These key factors influence string lifespan: 1. String Material Nickel-wound strings (common on electric guitars) wear faster. Phosphor bronze (common on acoustics) corrode easily. Coated strings (e.g., Elixir) can last 3–5x longer. 2. Body Chemistry Some players have more acidic sweat, which causes strings to rust faster. If you notice premature discoloration, this might be the reason. 3. Climate & Humidity Living in a humid or coastal environment causes faster string oxidation. Use a dehumidifier or case humidifier to help. 4. Playing Style If you strum aggressively, bend a lot, or play with a heavy pick, strings will naturally wear faster. How to Tell When It’s Time to Change Guitar Strings Here are 7 signs that it’s time for a new set: Dull tone – The strings sound lifeless and lack brightness. Tuning issues – Strings won’t stay in tune despite proper tuning. Rough texture – Strings feel gritty or sticky under your fingers. Discoloration or rust – Brown, black, or greenish tint? Time to change. String breakage – One string snapping is a warning. Replace them all. Poor sustain – Notes die out faster than usual. Intonation problems – Chords sound out of tune even when open strings are fine. Acoustic vs Electric vs Classical: String Lifespan Comparison Different guitars and string types wear differently. 🎵 Acoustic Guitar Strings Usually made from bronze or phosphor bronze. Prone to corrosion and tone dulling. Change every 1–2 months depending on playtime. 🎵 Electric Guitar Strings Often nickel-plated steel. Slightly longer lifespan but affected by heavy bending and distortion. Change every 2–4 weeks with frequent play. 🎵 Classical Guitar Strings (Nylon) Nylon treble strings don’t rust but lose tension and tone. Bass strings (wrapped in metal) degrade over time. Change every 3–6 months, or when tone declines. How to Extend the Life of Your Guitar Strings Want to make your strings last longer? Follow these tips: 1. Clean After Every Session Wipe down with a microfiber cloth to remove sweat and grime. 2. Wash Your Hands Before Playing This reduces oils and dirt transferred to the strings. 3. Use String Cleaner or Conditioner Products like Fast Fret or Dunlop String Cleaner can slow corrosion. 4. Store Your Guitar in a Case A closed case with a humidity control pack reduces oxidation. 5. Avoid Extreme Temperature Changes Hot or cold environments can loosen or stretch strings, affecting their lifespan. Should You Change All Strings at Once? Yes, always change the full set. Replacing only one string leads to: Uneven tone Mismatched string tension Premature breakage of older strings It may seem cheaper to change just one string, but in the long run, it affects sound quality and playability. Frequently Asked Questions (FAQs) What happens if I never change my guitar strings? Your tone will suffer, tuning becomes harder, strings may snap mid-performance, and your guitar becomes less enjoyable to play. How do I know what strings to buy? Check your guitar’s manual or consult your local music store. Different guitars require different gauges and materials. Is there a difference between coated and uncoated strings? Yes. Coated strings have a protective layer that resists dirt and moisture, lasting 3–5 times longer than uncoated ones. They're ideal for players looking for durability. Can old strings damage my guitar? They won’t damage the body, but rusty strings can wear down frets faster and cause more finger friction, which can make playing uncomfortable. Do bass guitar strings need changing as often? Bass strings last longer, but they still lose clarity. Change them every 3–6 months depending on usage. Final Thoughts: Listen to Your Strings There’s no strict rule that applies to everyone, but as a guitarist, it’s essential to stay in tune with your instrument—literally and figuratively. If your strings sound off, feel weird, or won’t stay in tune, don’t wait. Changing your guitar strings is cheap, easy, and gives you an instant upgrade in tone and performance. Whether you play once a week or daily, fresh strings can reignite your passion for playing. Quick Recap: Recommended Guitar String Replacement Schedule Playing Frequency Recommended String Change Casual (1–2x/week) Every 3–4 months Hobbyist (3–5x/week) Every 1–2 months Daily Players Every 2–4 weeks Gigging Musicians Every 1–2 weeks Studio Recording Before every session Also Read: How to Take Care of Your Acoustic Guitar

How to Play “Stand by Me” on Guitar – Complete Beginner-Friendly Guide
“Stand by Me” by Ben E. King is more than just a song—it’s an emotional anthem that has stood the test of time since its...
“Stand by Me” by Ben E. King is more than just a song—it’s an emotional anthem that has stood the test of time since its release in 1961. Its soulful vibe, simple lyrics, and heartfelt message make it a go-to track for guitar players of all levels. And the good news? It’s one of the easiest songs to learn on guitar, especially for beginners. Whether you're learning guitar to play around a campfire, impress a friend, or just enjoy music, this tutorial will help you master “Stand by Me” using simple chords and a relaxed strumming pattern. What You’ll Learn in This Blog: The four basic chords used in the song The full chord progression The strumming pattern (easy & intermediate) Lyric snippets with chords Playing tips and techniques to sound like a pro Why “Stand by Me” is a great beginner guitar song Chords Used in “Stand by Me” You’ll be happy to know that this song only uses four chords—all of which are open chords. These chords are among the first any beginner guitarist learns: G Major E Minor (Em) C Major D Major Here’s how to play each: G Major: 320003 E Minor: 022000 C Major: x32010 D Major: xx0232 These chords are easy on the fingers and offer a full, rich sound, perfect for acoustic or electric guitar. Chord Progression: The Magic Four The progression follows a repeating pattern throughout the song: G – Em – C – D This is a I–vi–IV–V chord progression, which is incredibly common in pop and soul music. It's smooth and satisfying to the ear, which is why the song feels so natural and timeless. The best part? You don’t need to memorize different progressions for verse and chorus—it’s the same throughout! Strumming Pattern for “Stand by Me” Start with this easy strumming pattern: Down – Down – Up – Up – Down – Up(D – D – U – U – D – U) If you're just starting out, you can simplify even more with just: Down – Down – Down – Down As you become more confident, work in the original groove of the song by listening to the track and mimicking the rhythm. Pro Tip: Try muting the strings slightly with your palm for a more percussive feel. Lyrics with Chords (Sample Verse) mathematica Repeat the same progression for the rest of the verses and chorus. It really is that simple! Capo Placement To play in the original key, place a capo on the 2nd fret. This raises the pitch to match Ben E. King’s recording, making it perfect for singing along. Pro Tips for Mastering the Song Practice chord transitions slowly. Don’t rush—accuracy is key. Use a metronome to maintain a consistent rhythm. Play along with a backing track or the original song to train your timing. Record yourself to hear your progress and fix any mistakes. Sing along while playing—it’ll help with rhythm and make the experience more fun! Video Tutorials Watching a visual breakdown can really boost your learning. Look up beginner guitar tutorials for “Stand by Me” on YouTube—many include on-screen chord changes and slow walkthroughs. Some YouTube channels to check out: Justin Guitar Marty Music GuitarZero2Hero Andy Guitar Why Learn “Stand by Me”? This song is ideal for beginners because: It uses only four easy chords Has a slow tempo, making it great for practice Offers repetitive structure—easy to memorize It’s a well-known, feel-good song that’s fun to play and sing Builds a strong foundation for learning other popular songs Fun Fact Did you know that “Stand by Me” has been covered by over 400 artists? From John Lennon to Florence and the Machine, its influence spans genres and generations. By learning this song, you’re tapping into a piece of music history. Final Thoughts “Stand by Me” is not just a song—it’s an experience. Learning to play it on the guitar is a rewarding first step into the world of music. With its simple chords, memorable progression, and heartfelt lyrics, it’s a timeless tune that’s easy to master and hard to forget. So grab your guitar, tune up, and let the music carry you. With just a little practice, you’ll be playing and singing this classic in no time. Also read: Best Way to Learn Guitar

How to Build a DIY Guitar Stand – Plus the Perfect Alternative!
A guitar is more than just a musical instrument—it’s a cherished companion. Every guitarist wants to keep their instrument safe, secure, and accessible. While you...
A guitar is more than just a musical instrument—it’s a cherished companion. Every guitarist wants to keep their instrument safe, secure, and accessible. While you can buy a guitar stand, creating a DIY guitar stand is a rewarding project that allows you to customize it to your style and needs. Plus, if you’re looking for a high-quality, stylish alternative, we’ll also introduce you to NordicStand—a beautifully designed floor stand that blends form and function. Why You Need a Guitar Stand Leaving your guitar leaning against a wall or resting on a couch is risky. A small bump or slip could lead to damage. A proper guitar stand protects your instrument from accidental falls and provides a dedicated space to display it proudly. A well-made guitar stand also helps:✅ Prevent scratches and dents✅ Keep the neck in good condition✅ Make your guitar easy to grab and play✅ Display your guitar as a piece of art DIY Guitar Stand – Step-by-Step Guide Creating a DIY guitar stand is easier than you might think. With a few basic tools and materials, you can build a functional and attractive stand that suits your guitar and space. Materials Needed: Wooden planks (oak, walnut, or pine) Screws and wood glue Soft padding (felt or cork) Sandpaper Wood stain or paint Measuring tape Drill and saw Step 1: Measure and Cut the Wood Measure your guitar’s height and width to determine the size of the stand. Cut two side supports and a base from the wooden planks. Ensure the base is wide enough to prevent tipping. Step 2: Sand and Smooth the Wood Use sandpaper to smooth out the edges and surfaces. This prevents splinters and gives the stand a professional finish. Step 3: Assemble the Stand Attach the side supports to the base using wood glue and screws. Ensure the angle provides enough support for the guitar's neck. Let the glue dry completely. Step 4: Add Padding Line the contact points with soft padding like felt or cork to prevent scratches on the guitar’s body and neck. Step 5: Finish and Stain Apply wood stain or paint to match your decor. Let it dry completely before placing your guitar on it. Challenges of DIY Guitar Stands While building a DIY guitar stand is rewarding, it comes with some challenges: Stability: Homemade stands may not provide enough stability for heavier instruments. Portability: Most DIY stands are not collapsible or travel-friendly. Durability: Without the right materials, DIY stands may wear down over time. NordicStand – The Perfect Alternative If you prefer a professional-grade stand that combines elegance and functionality, NordicStand is the ideal solution. Designed by the award-winning duo HarritSorensen and manufactured by Openhagen, this floor stand is crafted from sustainable materials and engineered for durability and style. Why NordicStand Stands Out: ✅ Sustainable Materials: Crafted from sustainably sourced wood, aluminum, and lined with oiled cork for a premium look and feel.✅ Collapsible & Portable: Lightweight at just 960 g (2.11 lb) and collapsible to 3 cm (1.18 in), making it easy to carry in a gig bag.✅ Universal Fit: Compatible with most stringed instruments, including acoustic guitars, electric guitars, basses, ukuleles, and mandolins.✅ Strong & Secure: Holds up to 11 kg (25 pounds)—perfect for heavier instruments.✅ Stylish Finishes: Available in Walnut, Oak, and Stained Oak to complement any decor.✅ Non-Slip Base: Ensures stability on any surface, from wood floors to carpet.✅ Innovative Design: Patent-pending design offers a modern, minimalist aesthetic with maximum functionality. Specifications: Weight: 960 g (2.11 lb) Height: 22.5 cm (8.8 in) | Collapsed Height: 3 cm (1.18 in) Base Width: 32 cm (12.6 in) | Collapsed Width: 26 cm (10.2 in) Capacity: Supports up to 11 kg (25 lb) Designed for Musicians On-the-Go NordicStand’s collapsible design makes it perfect for traveling musicians. It fits neatly in a gig bag, ensuring that you always have a secure place to rest your guitar, no matter where you play. DIY or NordicStand – Which One is Right for You? Feature DIY Guitar Stand NordicStand Materials Wood of your choice Sustainable wood, aluminum, oiled cork Portability No Yes (lightweight and collapsible) Stability Depends on design High stability with non-slip base Compatibility Guitar-specific Works with guitars, basses, ukuleles, and mandolins Design Customizable Modern and minimalist Assembly Required No assembly needed Final Thoughts A DIY guitar stand is a fun project that allows you to create a personalized display for your instrument. However, if you’re looking for a stylish, high-quality alternative, NordicStand is the ultimate solution. Its sustainable materials, elegant design, and portability make it a must-have for any musician. Whether you choose to build your own or invest in NordicStand, giving your guitar a proper place to rest will keep it safe and ready for your next performance.

Electric Guitar vs. Acoustic Guitar – Which One Should You Choose?
If you're starting your guitar journey or looking to upgrade, you may be wondering: Should I get an electric guitar or an acoustic guitar? Both...
If you're starting your guitar journey or looking to upgrade, you may be wondering: Should I get an electric guitar or an acoustic guitar? Both have their unique characteristics, playing styles, and ideal use cases. This guide will compare them in terms of sound, playability, cost, versatility, and maintenance to help you make the best decision. 1. What is an Acoustic Guitar? 🎸 An acoustic guitar produces sound naturally through its hollow body, which amplifies the vibrations of the strings. No external amplification is needed, making it perfect for unplugged sessions, singer-songwriter performances, and folk or classical music. Pros of an Acoustic Guitar: ✅ Portable & No Extra Gear Required – Play anywhere without an amp.✅ Rich, Natural Sound – Warm and resonant tones.✅ Great for Beginners – Simple setup with no cables or electronics.✅ Enhances Finger Strength – Slightly thicker strings help build finger muscles. Cons of an Acoustic Guitar: ❌ Less Sound Variety – No distortion, effects, or volume control.❌ Harder to Play for Beginners – Thicker strings can be tough on fingers.❌ Limited Amplification – Sound projection depends on the guitar’s build. 2. What is an Electric Guitar? 🎸⚡ An electric guitar requires an amplifier to produce sound, as its body is solid and doesn’t resonate like an acoustic guitar. It’s commonly used in rock, blues, metal, and jazz due to its ability to modify tones using effects pedals and amplifiers. Pros of an Electric Guitar: ✅ Easier to Play – Lighter strings and lower action make it beginner-friendly.✅ Sound Customization – Use distortion, reverb, and other effects for unique tones.✅ Louder & Adjustable Volume – Ideal for live performances.✅ Versatile for Multiple Genres – Rock, jazz, metal, blues, and more. Cons of an Electric Guitar: ❌ Needs an Amp & Accessories – Requires additional gear to play.❌ More Expensive Setup – Costs more than an acoustic due to electronics.❌ Less Portable – Amplifiers and cables make it harder to travel with. 3. Key Differences Between Electric & Acoustic Guitars Feature Acoustic Guitar Electric Guitar Sound Warm, natural tones Versatile, customizable with effects Ease of Play Thicker strings, requires more finger strength Lighter strings, easier for beginners Portability Fully portable, no amp needed Requires an amp and cables Best For Folk, country, classical, singer-songwriters Rock, blues, jazz, metal, pop Cost More affordable upfront Costs more due to amp and accessories Learning Curve Can be challenging at first Easier to start playing 4. Which Guitar is Best for Beginners? If you prefer a natural sound and want a simple setup, go for an acoustic guitar. If you like rock, blues, or metal and want an easier playing experience, an electric guitar is better. 5. Should You Learn Acoustic Before Electric? There’s a myth that you must learn acoustic guitar first before moving to electric. While acoustic guitars strengthen your fingers, starting with an electric guitar is fine if that's the style you prefer. Choose the one that keeps you motivated to practice! 6. Final Verdict – Which One Should You Buy? Choose an Acoustic Guitar if: You want a natural, unplugged sound and a portable, simple instrument. Choose an Electric Guitar if: You want a customizable sound, easier playability, and love rock or jazz music. Pro Tip: If budget allows, owning both can give you the best of both worlds! 🎸✨ also read: How to Tune a Guitar
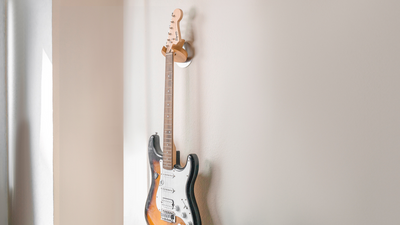
How to Take Care of Your Acoustic Guitar: Expert Tips
An acoustic guitar is more than just a musical instrument; it’s an investment, a source of joy, and for many, a lifelong companion. Proper care...
An acoustic guitar is more than just a musical instrument; it’s an investment, a source of joy, and for many, a lifelong companion. Proper care and maintenance are essential to keep your guitar in top shape and ensure it produces the best sound quality. In this blog, we’ll guide you through the essential steps to take care of your acoustic guitar and make it last for years. 1. Store Your Guitar Properly Proper storage is crucial for maintaining your acoustic guitar’s condition. Here are a few tips: Use a Hard Case: A sturdy hard case protects your guitar from temperature changes, humidity, and accidental bumps. Avoid Extreme Temperatures: Never leave your guitar in a hot car or near a heater. Extreme heat can warp the wood, while cold temperatures can cause cracking. Keep It Upright: Use a guitar stand or wall mount to store your guitar upright. This prevents unnecessary pressure on the neck. 2. Maintain Optimal Humidity Levels Wood is sensitive to humidity, and your acoustic guitar is no exception. Improper humidity levels can cause the wood to swell or crack. Ideal Humidity Range: Keep the humidity level between 45% and 55%. Use a Guitar Humidifier: Place a humidifier in your guitar case to maintain a stable environment, especially in dry climates. Avoid Moisture Exposure: Keep your guitar away from damp areas, as excessive moisture can damage the finish and wood. 3. Clean Your Guitar Regularly Dirt and grime can accumulate on your guitar over time, affecting its appearance and sound. Wipe It Down After Playing: Use a soft, lint-free cloth to wipe the strings, fretboard, and body after every session. Use Guitar Polish: Apply a specialized guitar polish to the body to maintain its shine, but avoid overusing it. Clean the Strings: Dirty strings lose their tone quickly. Use string cleaner or rubbing alcohol to remove oils and debris. 4. Change Strings Periodically Strings are the heart of your acoustic guitar, and old strings can make even the best guitar sound dull. How Often to Change Strings: Replace strings every 2-3 months or whenever they sound lifeless. Choose the Right Strings: Use strings designed for acoustic guitars and match the gauge to your playing style. Proper String Installation: When changing strings, ensure they’re wound correctly to avoid slipping and maintain tuning stability. 5. Tune Your Guitar Regularly Keeping your guitar in tune is not only important for sound quality but also for maintaining string tension. Use a Guitar Tuner: A digital tuner ensures accurate tuning and saves time. Check Tuning Before Playing: Always tune your guitar before playing, especially if it’s been stored for a while. 6. Handle with Care How you handle your acoustic guitar directly impacts its longevity. Use a Strap: A guitar strap prevents accidental drops while standing or moving. Avoid Touching the Finish: Oils from your hands can damage the guitar’s finish. Hold it by the neck or body edges. 7. Protect the Fretboard and Bridge The fretboard and bridge are crucial components of your guitar. Regular maintenance ensures their longevity. Condition the Fretboard: Apply lemon oil or fretboard conditioner every few months to prevent dryness and cracking. Inspect the Bridge: Ensure the bridge is firmly attached to the body. If it starts lifting, have it repaired by a professional. 8. Schedule Professional Maintenance Sometimes, your guitar needs expert care that goes beyond regular cleaning. Get a Yearly Check-Up: Take your guitar to a professional luthier once a year for a thorough inspection. Fix Issues Immediately: If you notice any cracks, loose parts, or buzzing sounds, get them repaired promptly. Fret Dressing: Over time, frets may wear down and affect playability. A luthier can file and polish them as needed. 9. Travel with Caution If you travel with your acoustic guitar, take extra precautions to keep it safe. Use a Padded Case: A padded gig bag or hard case provides the best protection. Loosen the Strings: Loosen the strings slightly to reduce tension during long journeys. Handle with Care: Avoid placing heavy objects on the case and ensure it’s stored securely during transit. 10. Avoid DIY Repairs While some minor fixes can be done at home, avoid attempting complex repairs yourself. Mistakes can cause further damage. Always consult a professional for serious issues. Final Thoughts Taking care of your acoustic guitar ensures it remains a joy to play and retains its value over time. By following these maintenance tips, you can enjoy consistent performance and extend the life of your instrument. Whether you’re a beginner or a seasoned guitarist, investing time in proper guitar care is always worth it. Treat your acoustic guitar with the care it deserves, and it will reward you with beautiful music for years to come. By implementing these care practices, your acoustic guitar will not only sound great but also look as good as the day you bought it. Ready to keep your acoustic guitar in top shape? Start following these tips today and let your music shine!